Documentation Index
Fetch the complete documentation index at: https://formbricks.com/docs/llms.txt
Use this file to discover all available pages before exploring further.
Purpose
A research panel is a pre-recruited group of participants who have agreed to take part in multiple surveys over time. Building your own panel enables you to:- Conduct research with a well-understood audience
- Target specific demographics or user profiles
- Distribute surveys quickly without recruiting new participants each time
- Track participant engagement and responses over time
Formbricks Approach
Formbricks provides all the tools you need to build and manage a research panel:- Profiling surveys to collect participant demographics and preferences
- Contact management to store and organize panel member data
- Segments to group participants by attributes for targeted research
- Personal links to distribute unique survey links to specific panel members
Overview
Building a research panel with Formbricks involves these key steps:- Create a profiling survey to collect panel member information
- Export responses and prepare contact data
- Upload contacts into Formbricks
- Create segments to group panel members
- Create research surveys and distribute personal links
Step-by-step guide
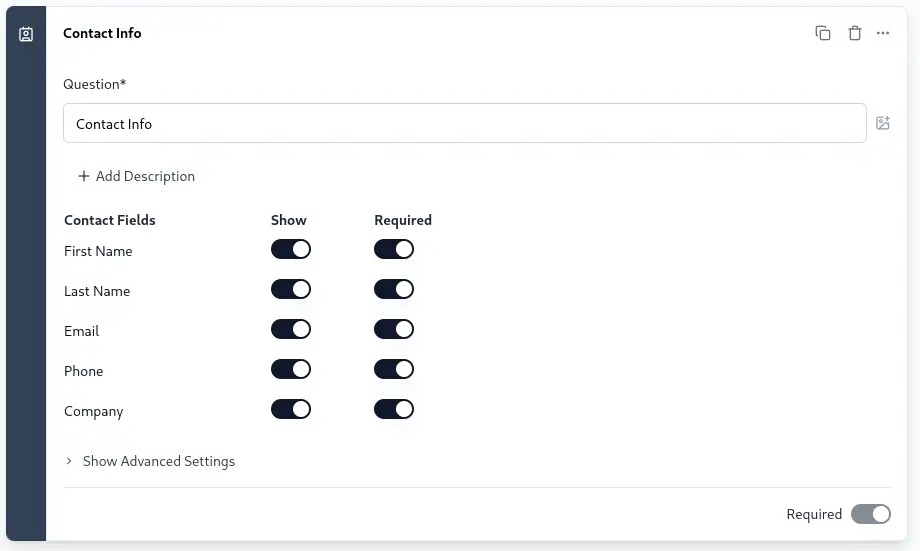
Create a profiling survey
Start by creating a survey to collect essential information about your panel members. This profiling survey should gather:
- Contact information: Email, name, and any identifiers you need
- Demographics: Age, location, occupation, etc.
- Preferences: Product usage, interests, or other relevant attributes
- Go to app.formbricks.com and click Create Survey
- Choose a blank survey or start from a template
- Add questions to collect the data you need for segmentation
-
Include a Contact Info question type to capture email addresses
Collect profiling responses
Distribute your profiling survey and collect responses from potential panel members. You can share the survey via:
- Direct link
- Social media
- Your website
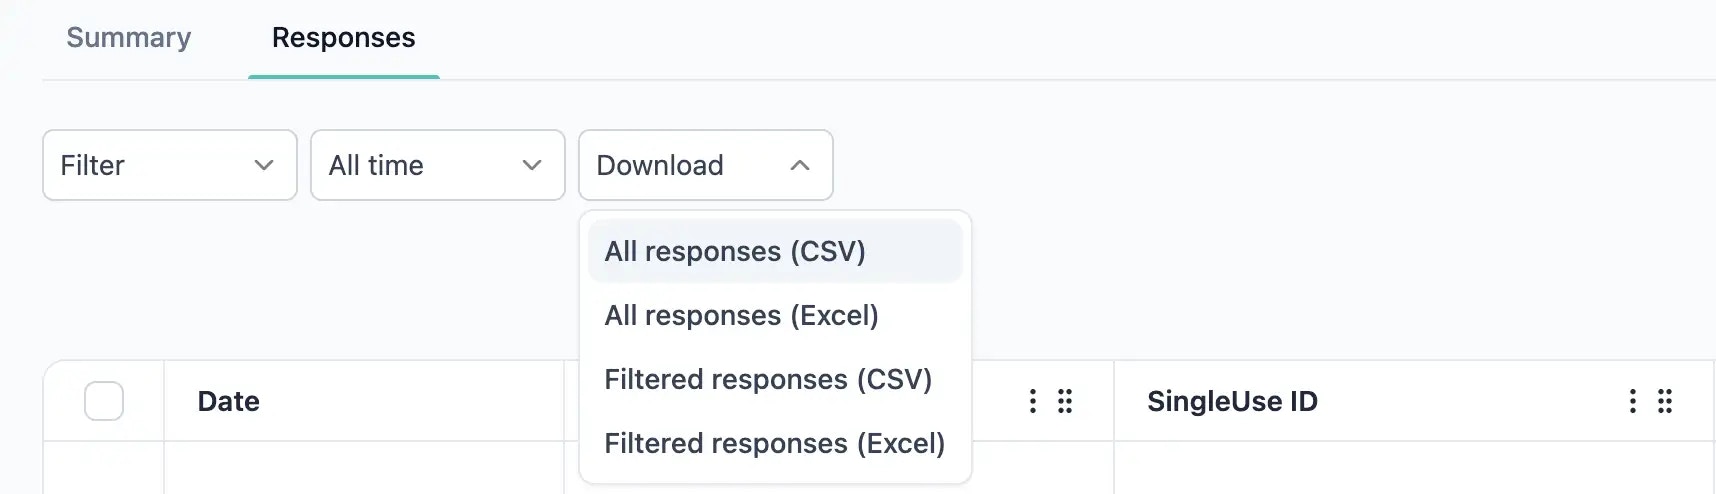
Download the responses CSV
Once you have collected responses, export them for processing:
- Navigate to your profiling survey’s Summary page
- Click the Download button
- Select CSV format
-
Save the file to your computer
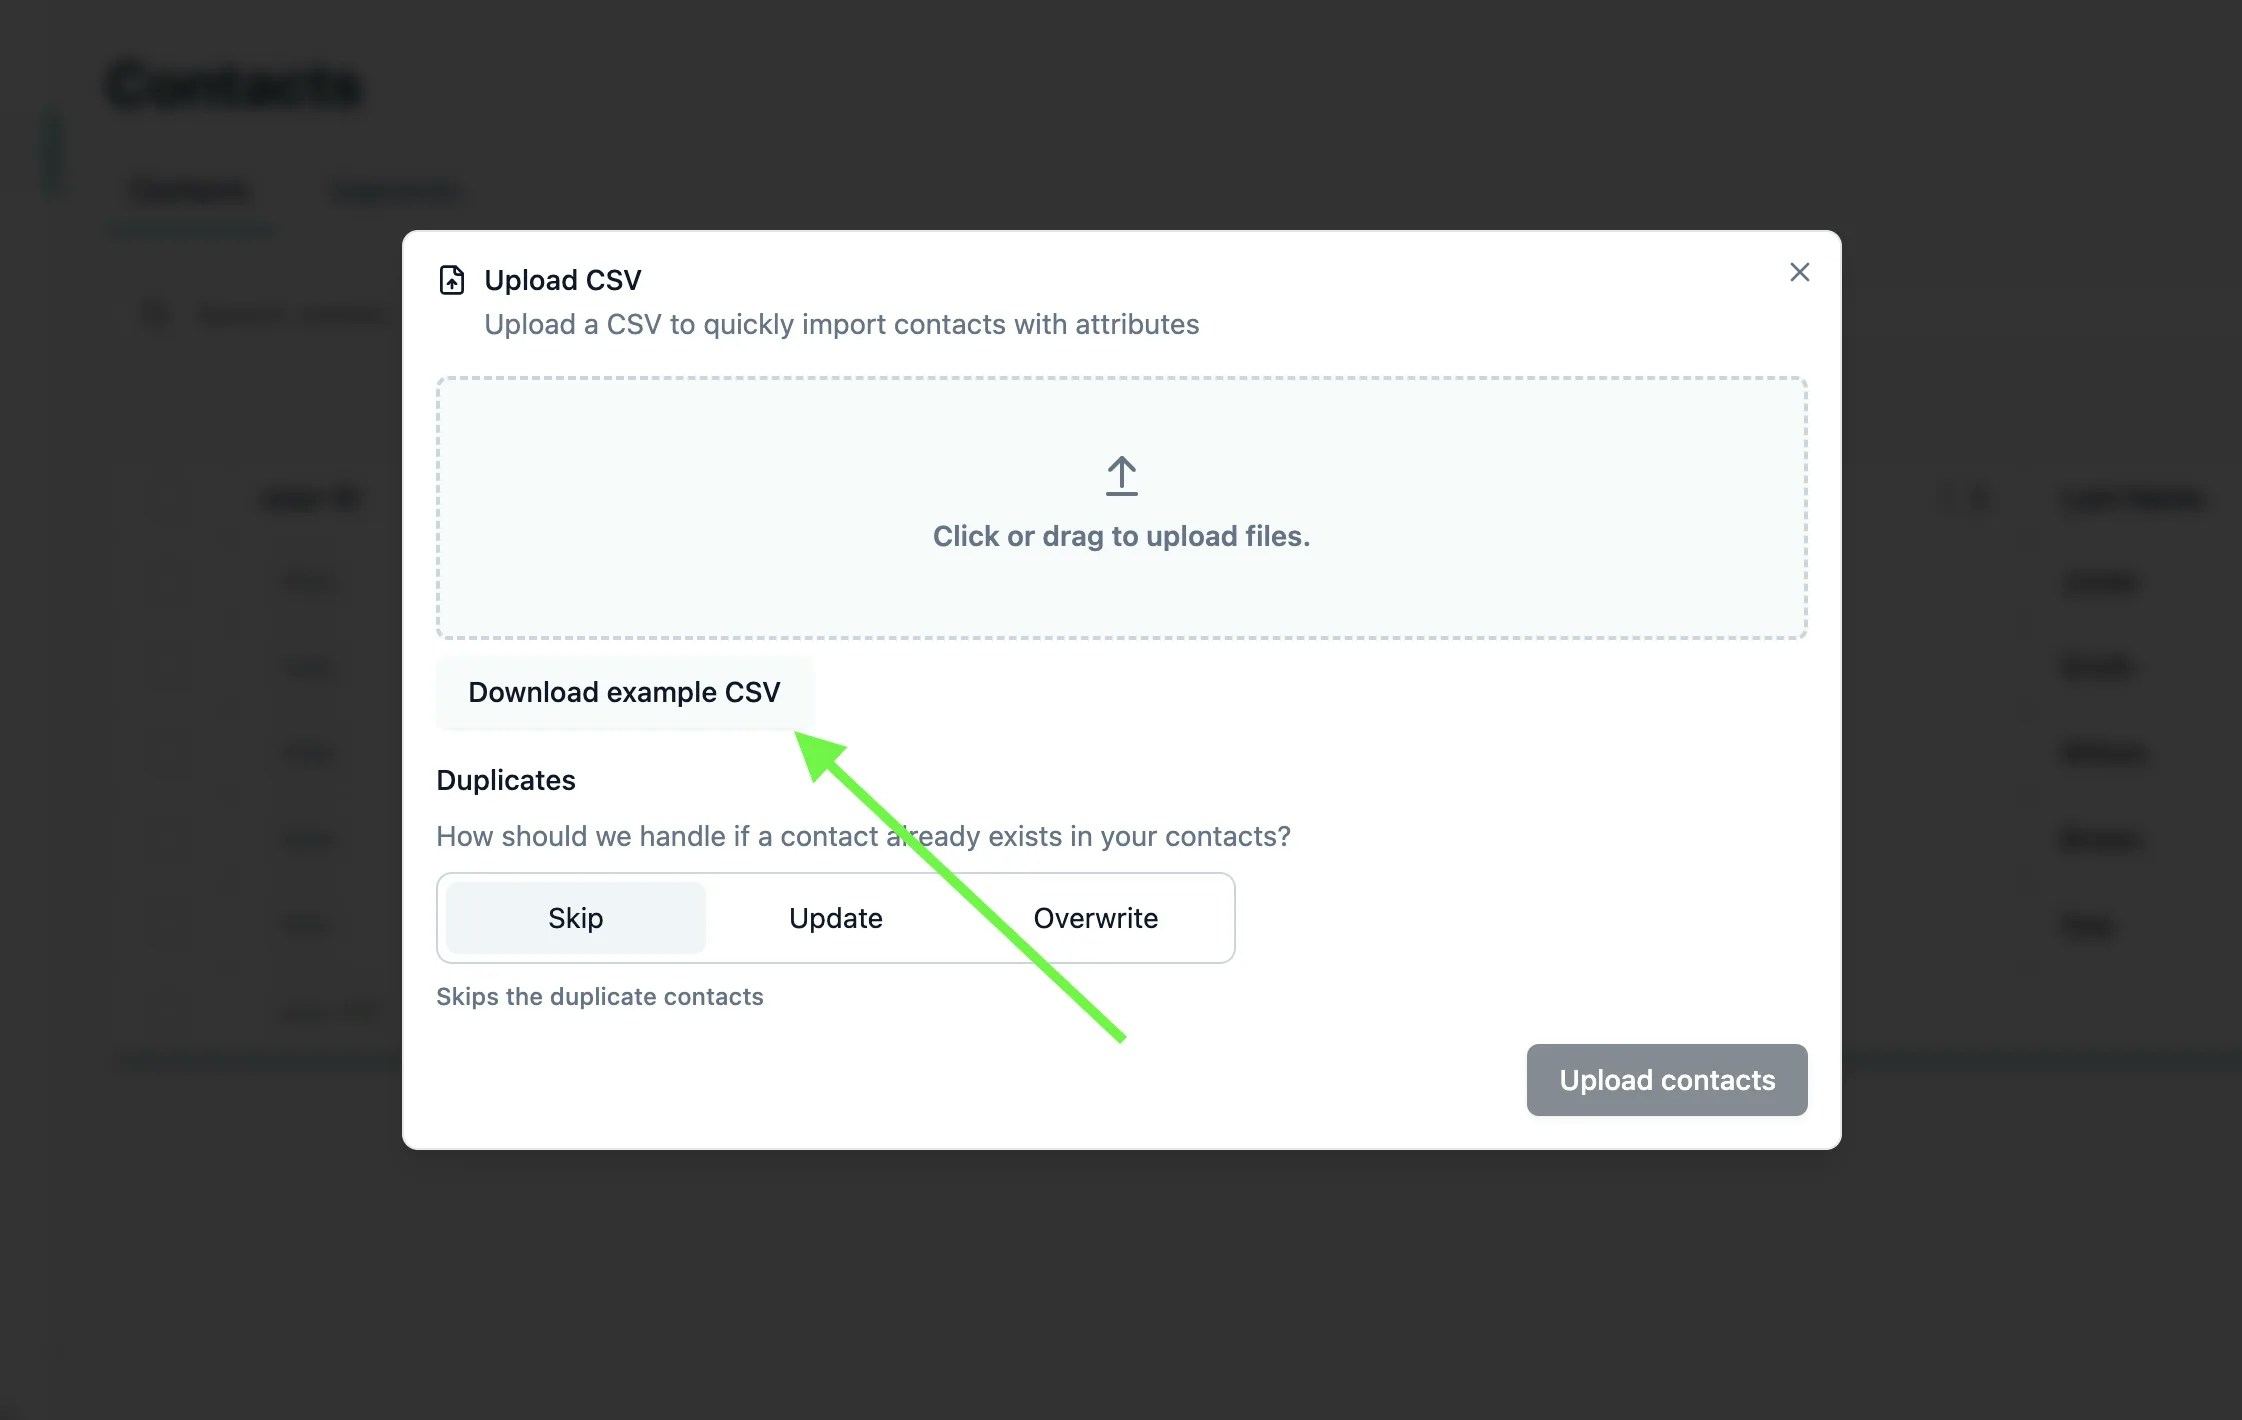
Download the example contact upload CSV
To understand the required format for uploading contacts, download the example CSV:
- Go to the Contacts section in your Workspace
- Click Upload Contacts
-
Download the Example CSV to see the required column structure
Map profiling responses to contact attributes
Transform your profiling survey responses into the contact upload format:
- Open both CSV files (responses and example template)
- Create a new spreadsheet matching the upload template structure
- Map each profiling survey question to a contact attribute column:
- Email →
emailcolumn - Name →
firstName,lastNamecolumns - Other answers → Custom attribute columns
- Email →
| Survey Question | Contact Attribute |
|---|---|
| ”What is your email?” | email |
| ”What is your name?” | firstName, lastName |
| ”What industry do you work in?” | industry |
| ”How large is your company?” | companySize |
| ”What is your job title?” | jobTitle |
Upload contacts to Formbricks
Import your panel members into Formbricks:
- Go to the Contacts section
- Click Upload Contacts
- Select your prepared CSV file
- Review the attribute mapping
- Complete the upload
Create segments for targeting
Group your panel members into segments based on their attributes:
- Go to the Contacts tab
-
Click Create Segment
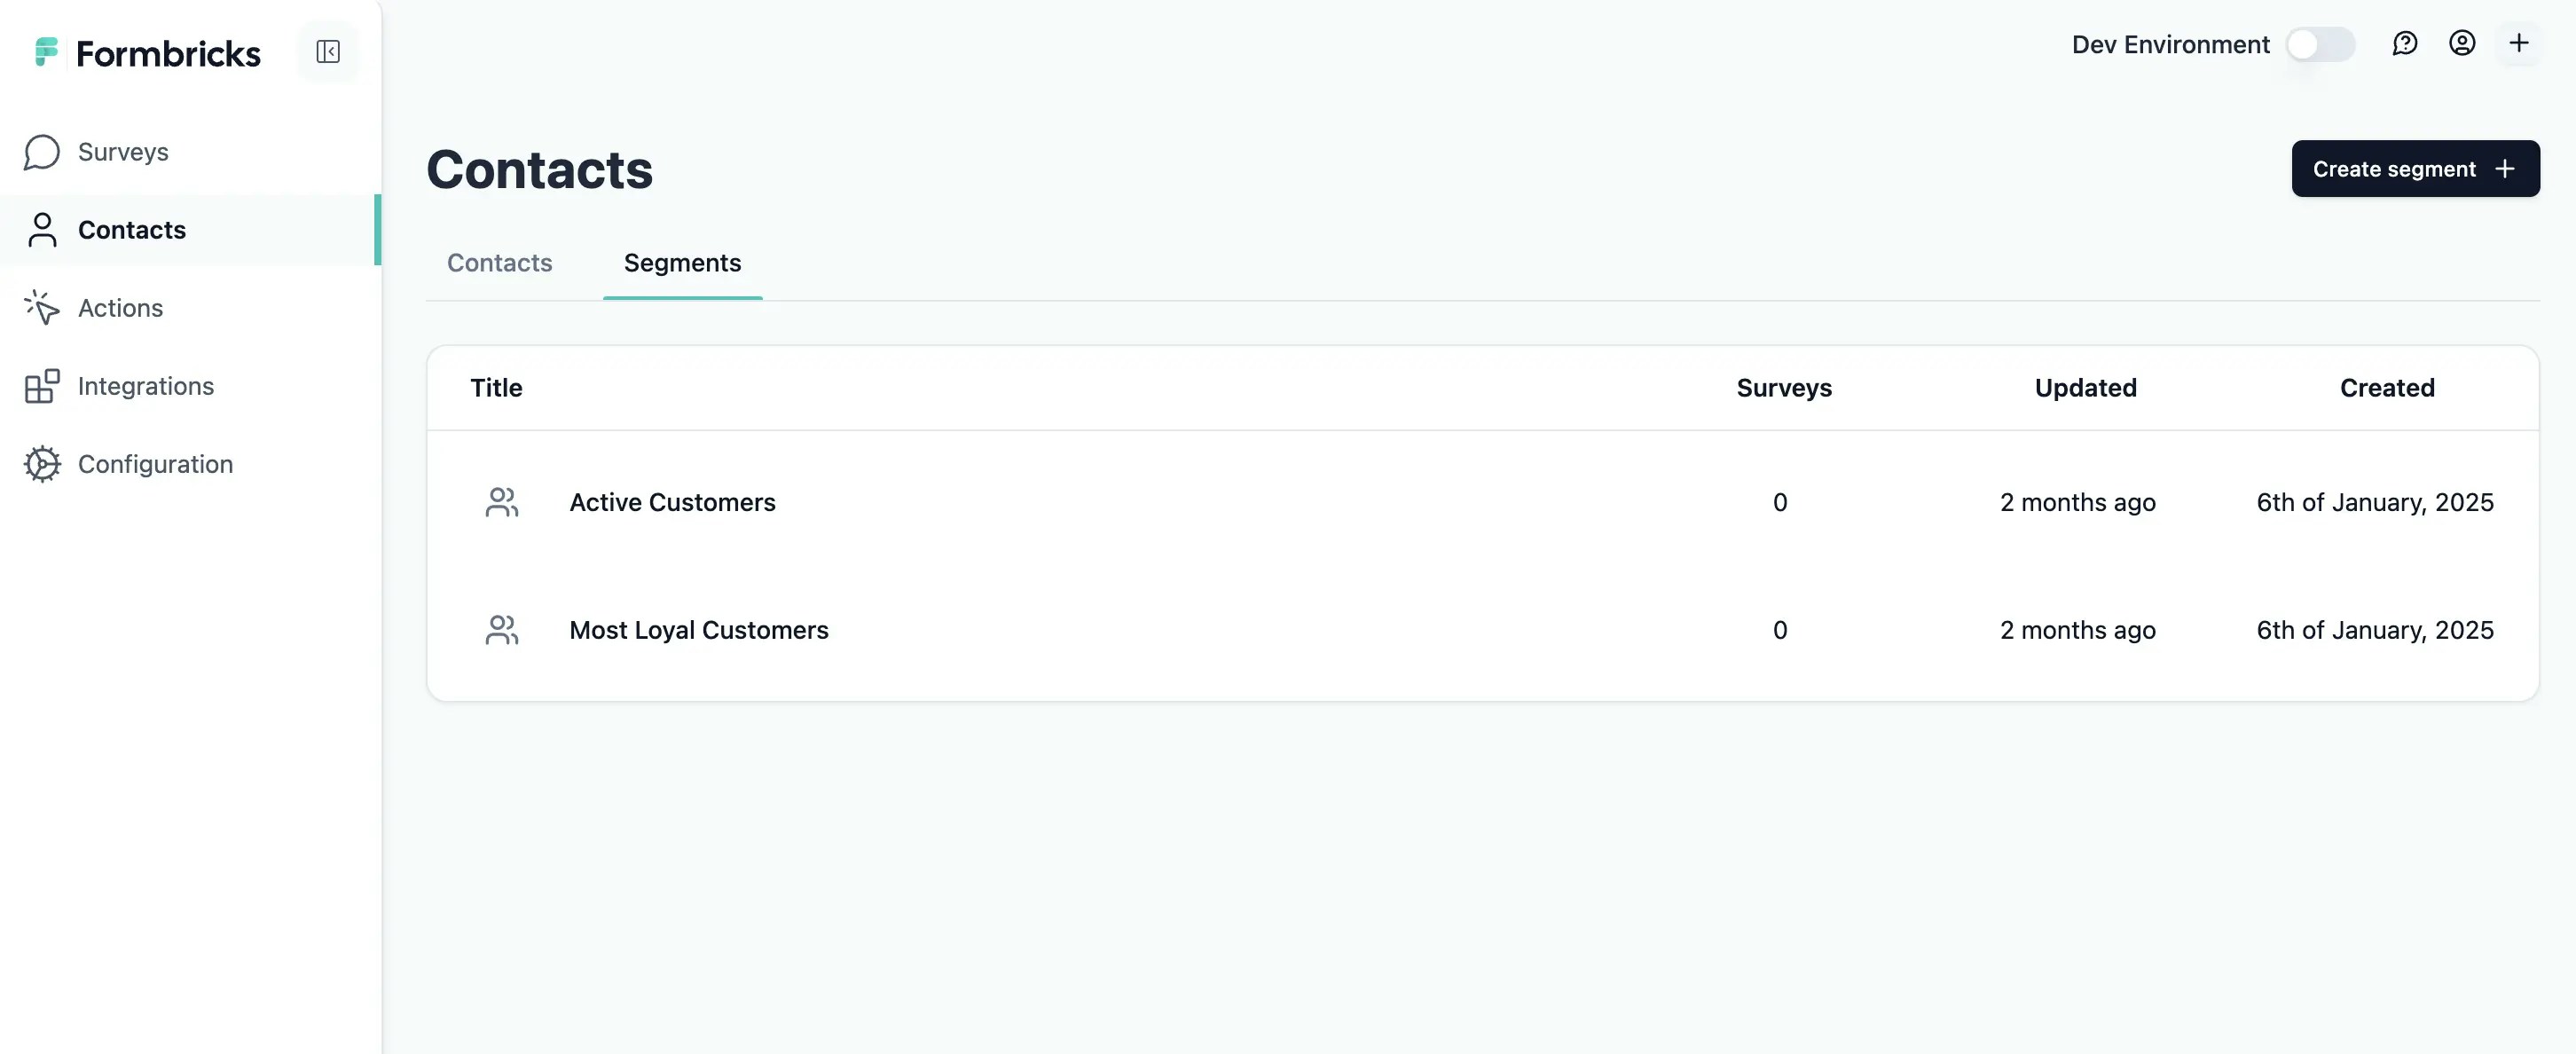
-
Define filter conditions based on the attributes you collected:
- Example:
industryequals “Technology” ANDcompanySizeequals “50-200”
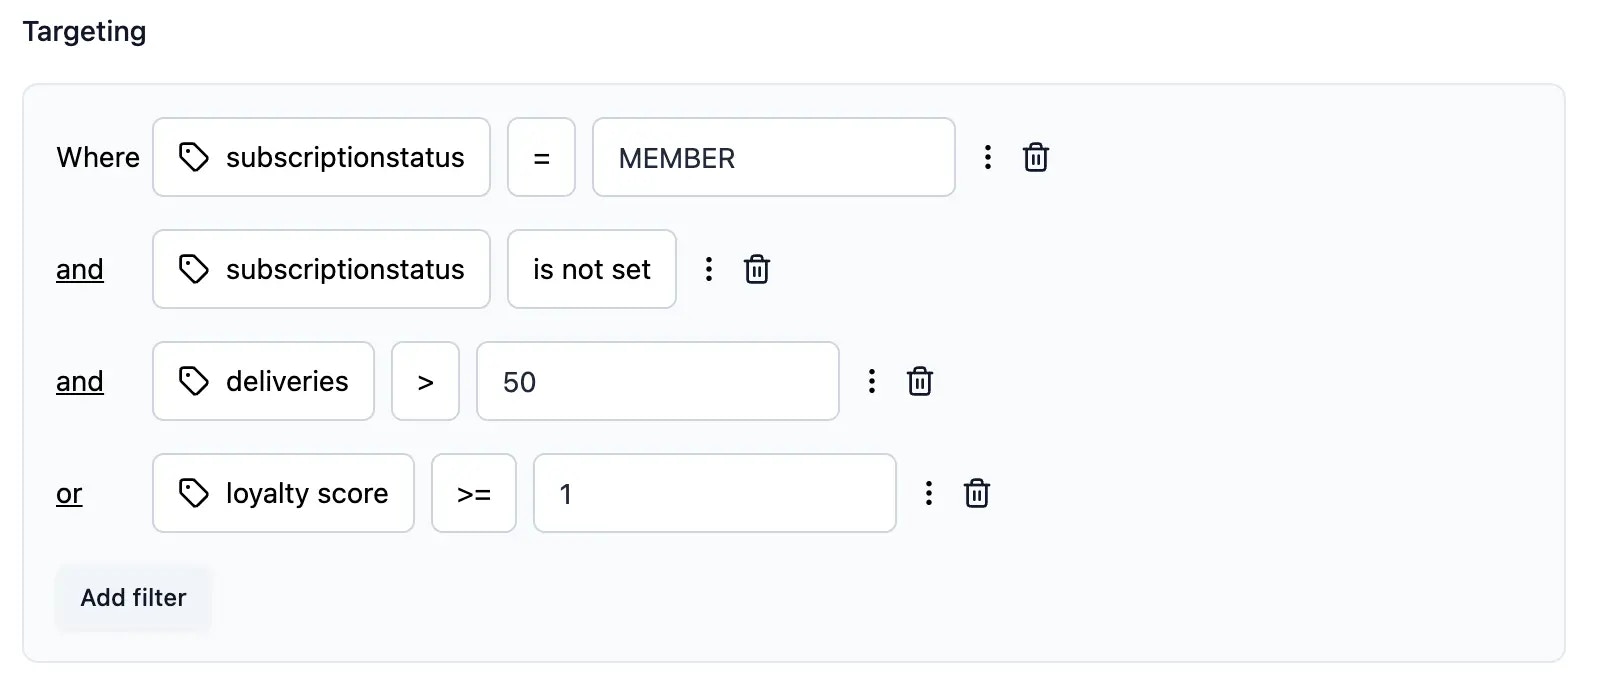
- Example:
- Name your segment descriptively (e.g., “Tech SMB Professionals”)
- Save the segment
Create a research survey
Now create the survey you want to distribute to your panel:
- Click Create Survey
- Design your research survey with the questions you need
- Configure survey settings as needed
- Publish the survey
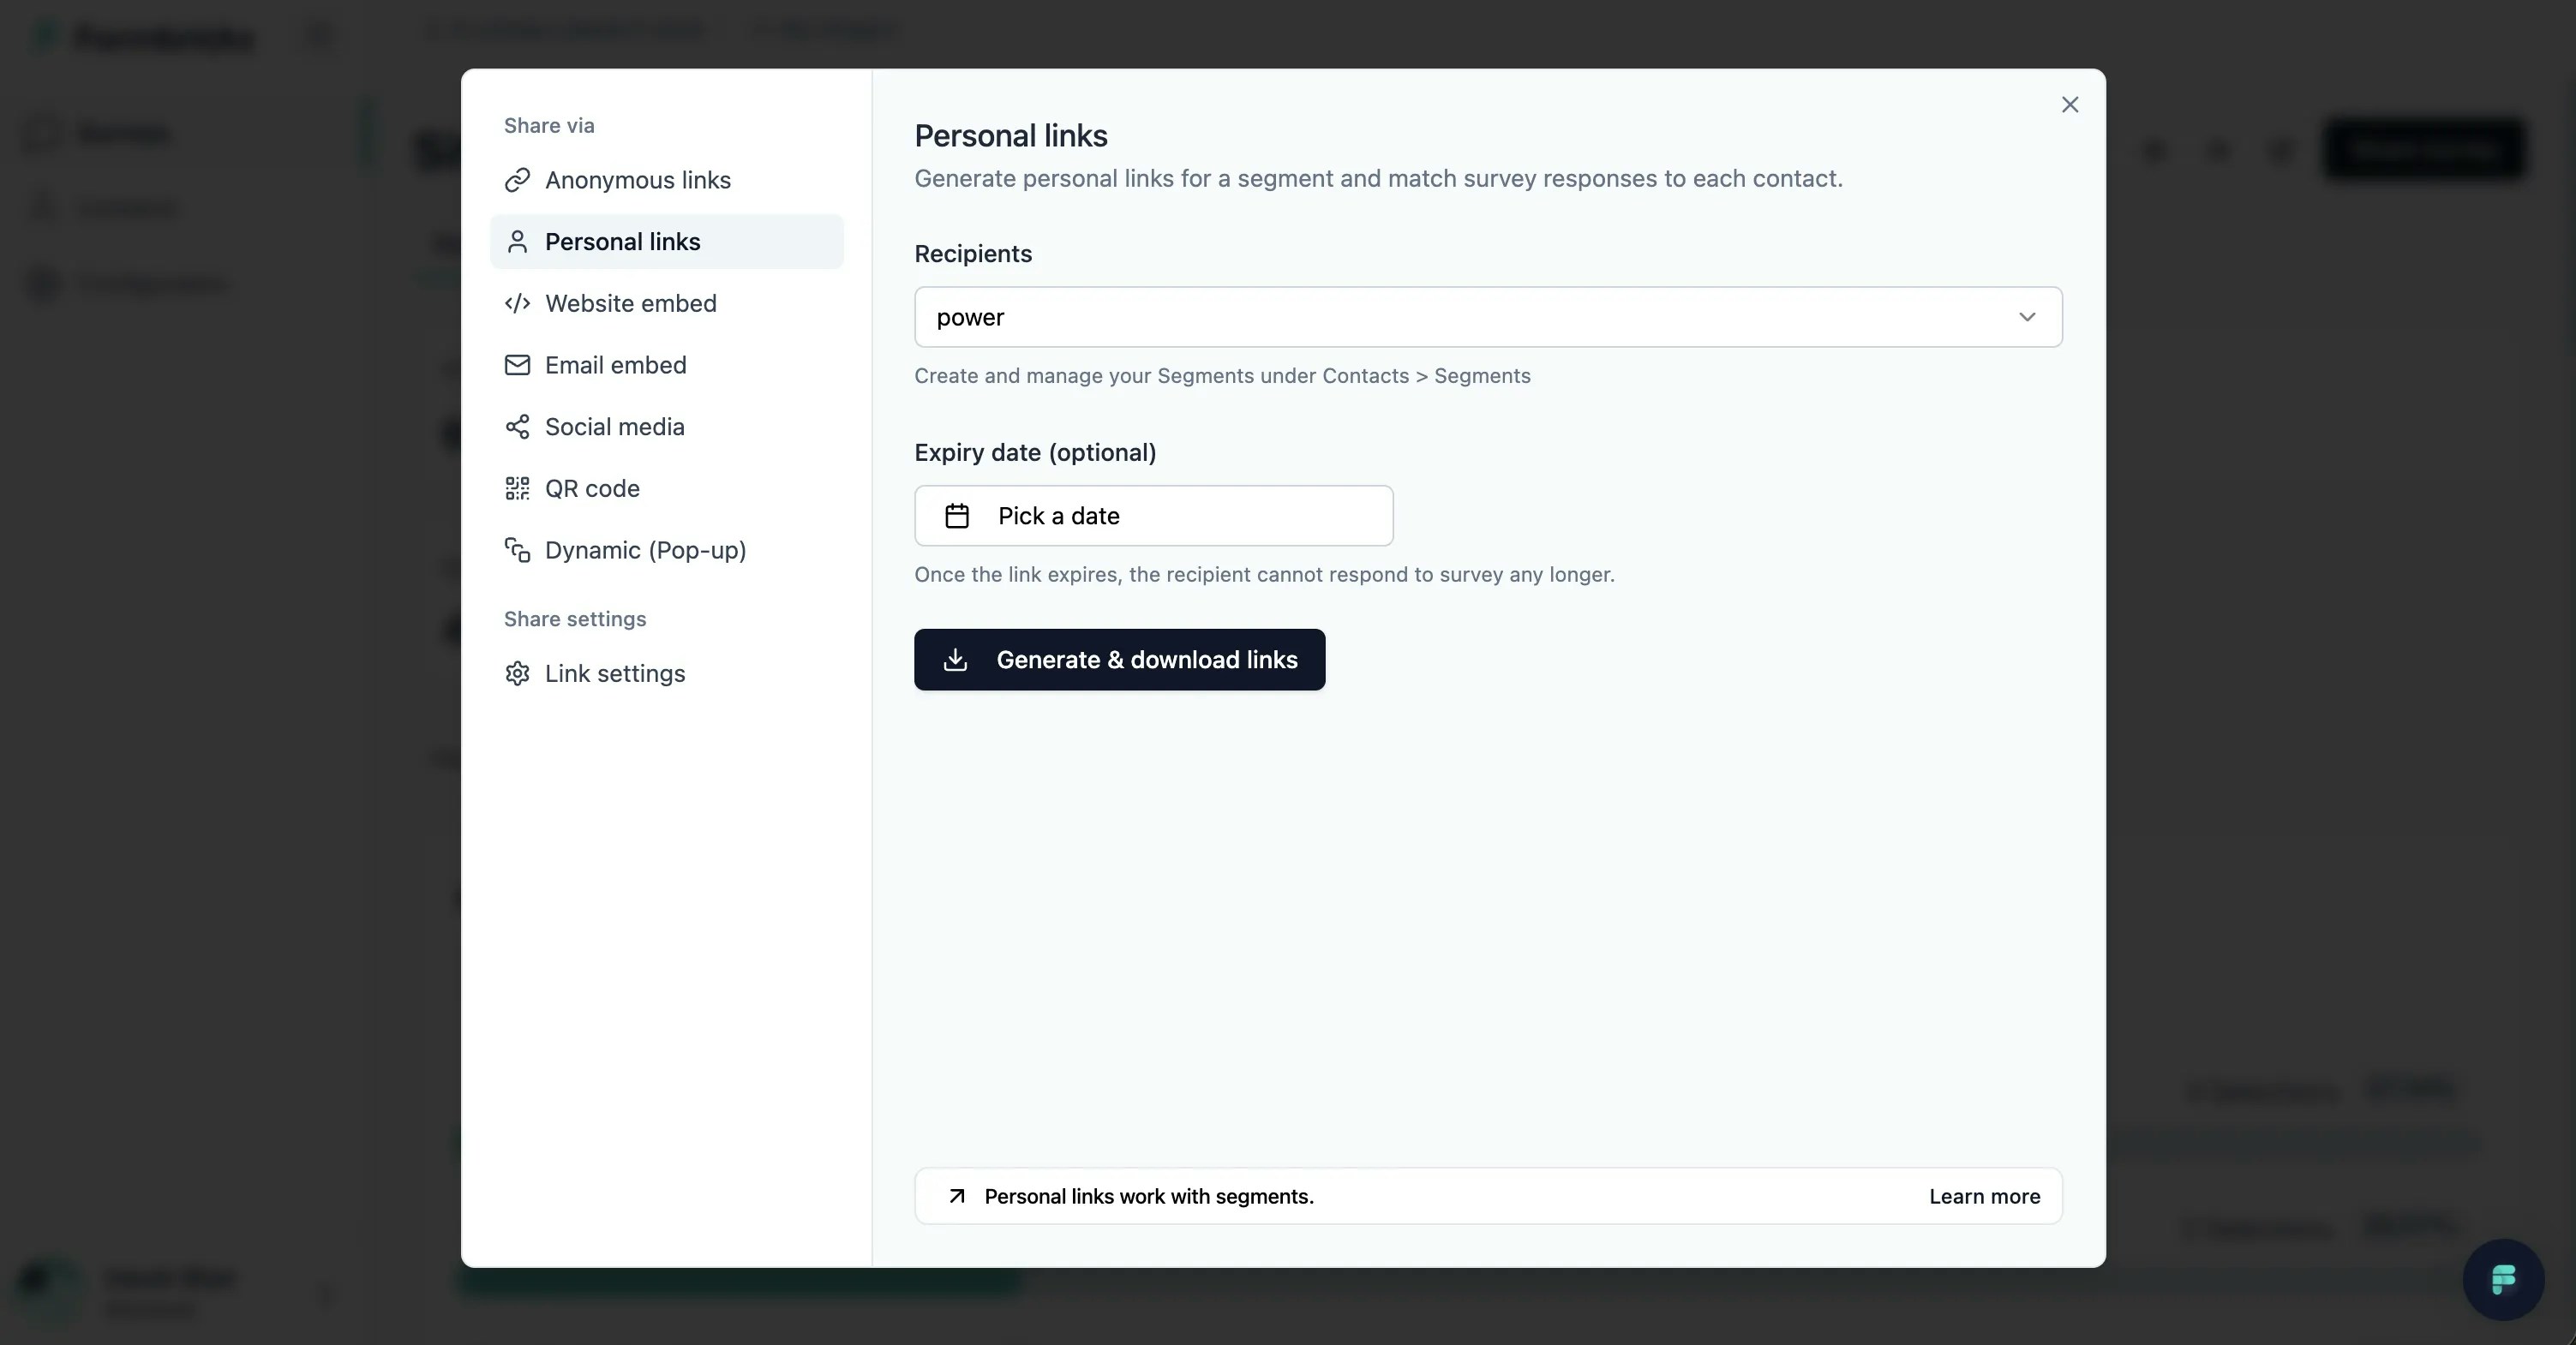
Generate personal links for your segment
Distribute unique survey links to your panel segment:
- Navigate to your research survey’s Summary page
- Click Share survey
- Select the Personal Links tab
- Choose the segment you want to survey from the dropdown
- Optionally set an expiry date for the links
-
Click Generate & download links
Benefits of this approach
| Benefit | Description |
|---|---|
| Response attribution | Know exactly who responded to each survey |
| Targeted research | Survey specific segments without bothering others |
| Panel management | Maintain a centralized database of research participants |
| Reusability | Use the same panel for multiple research initiatives |
| Data enrichment | Build up participant profiles over time with each survey |
Next steps
- Personal Links - Learn more about generating and managing personal survey links
- Advanced Targeting - Explore detailed segmentation options
- Hidden Fields - Pass additional data into surveys via URL parameters