Docs Feedback allows you to measure how clear your documentation is.
Purpose
Your users don’t spend as much time thinking about your product as you do. To fight the “Curse of Knowledge” you have to measure how clear your docs are.
Installation
To get this running, you’ll need a bit of time. Here are the steps we’re going through:
-
Set up Formbricks Cloud
-
Build the frontend
-
Connect to API
-
Test
-
Create a Formbricks Cloud account.
-
In the top-right menu, you can switch between “Development” and “Production” environments. These are separate, so your test data won’t affect real insights. Switch to “Development”:


- Change the Internal Question ID of the first question to “isHelpful” to make your life easier 😉
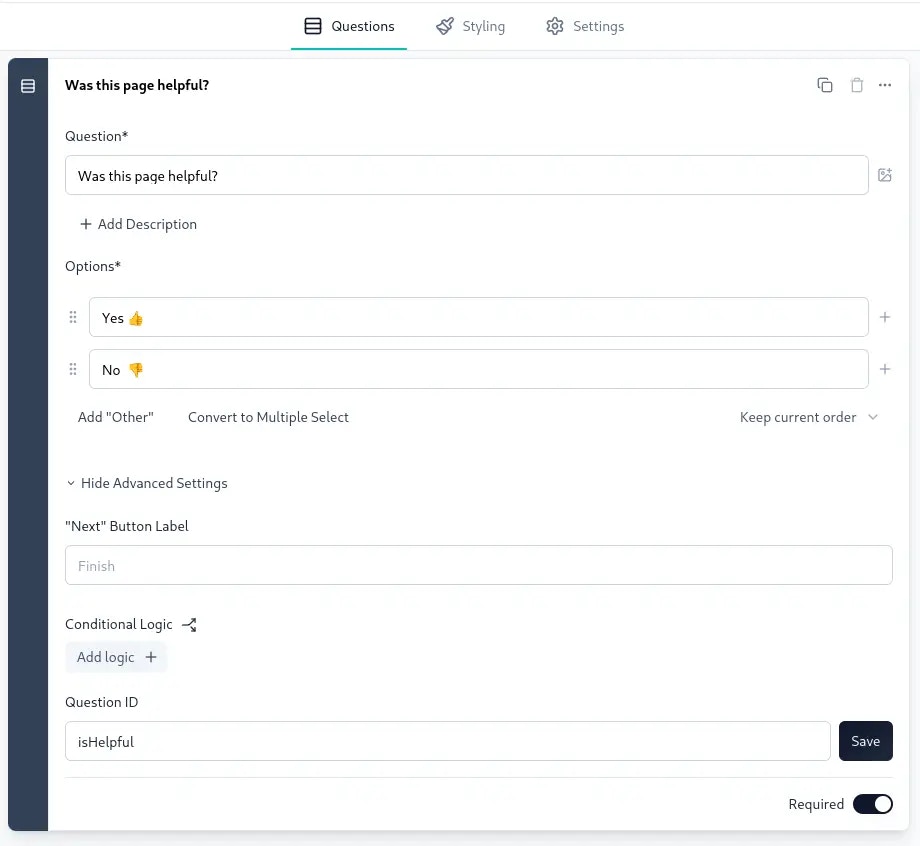
- Similarly, you can change the Internal Question ID of the Please elaborate question to “additionalFeedback” and the one of the Page URL question to “pageUrl”.
The answers must be identical. If you want different options than “Yes 👍” and “No 👎”, you need to update the choices accordingly. They must match the frontend we’re building in the next step.
- Click on “Continue to Settings or select the audience tab manually. Scroll down to “Survey Trigger” and create a new Action:
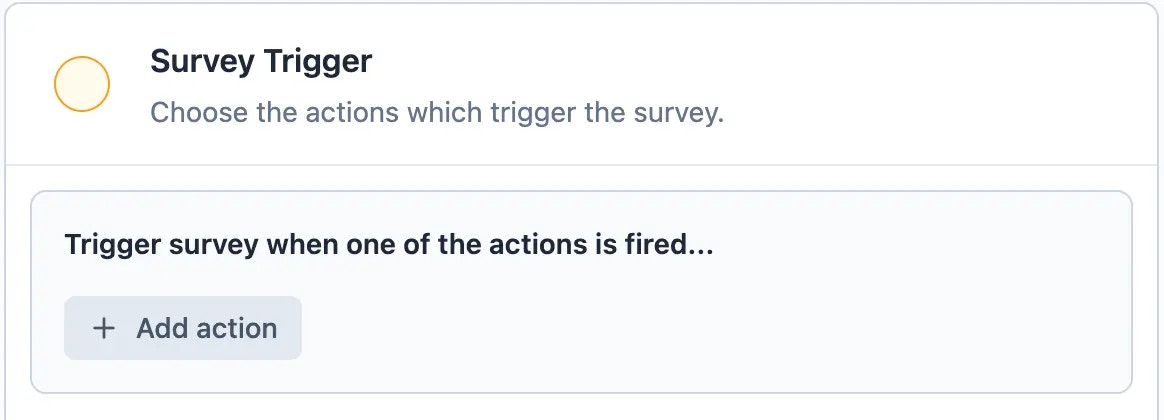
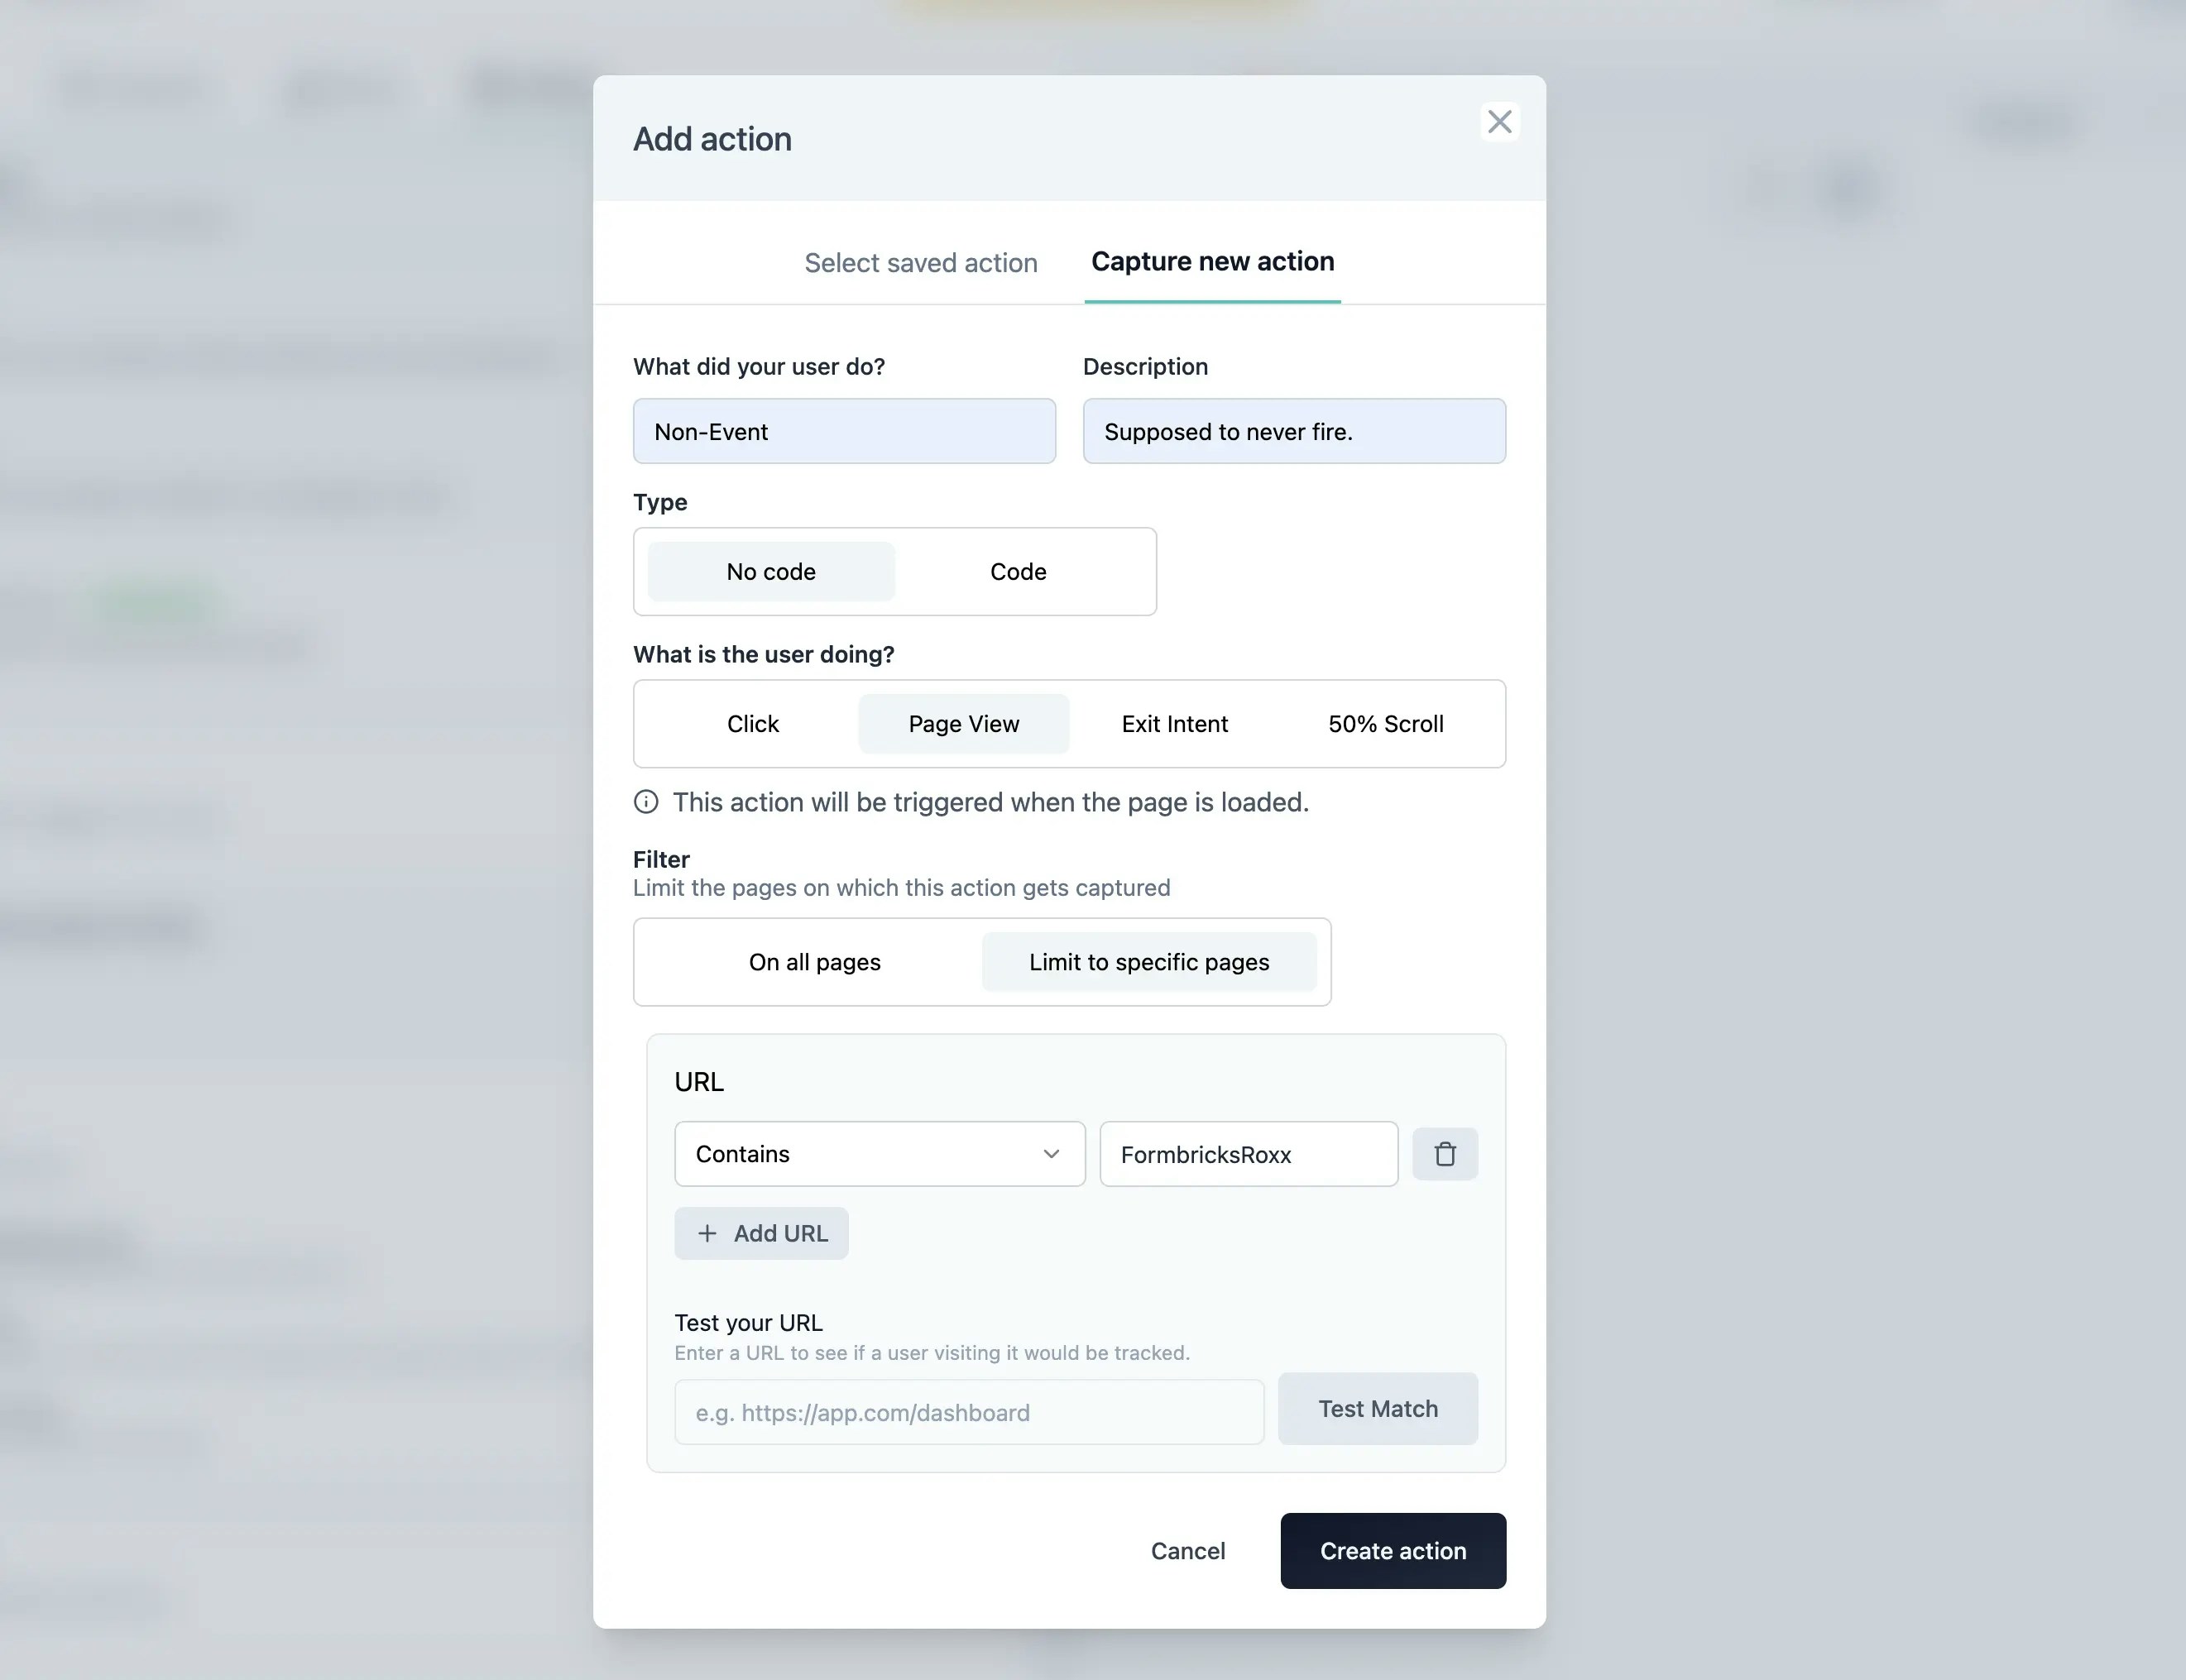
- Our goal is to create an event that never triggers. This might seem odd, but it’s a necessary workaround. Fill out the action as shown in the screenshot:
- Select the Non-Event in the dropdown. Now you see that the “Publish survey” button is active. Publish your survey 🤝
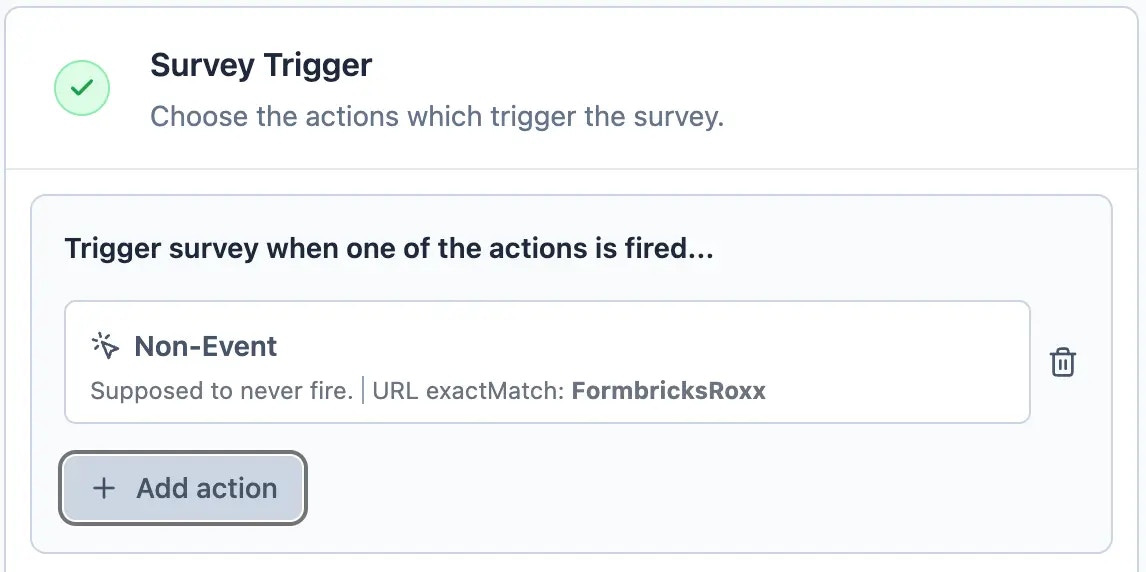 You’re all setup in Formbricks Cloud for now 👍
2. Build the frontend
Your frontend might work differently Your frontend likely looks and works
differently. This is an example specific to our tech stack. We want to
illustrate what you should consider building yours.
-
Once the user selects yes/no, a partial response is sent to the Formbricks API. It includes the feedback and the current page url.
-
Then the user is presented with an additional open text field to further explain their choice. Once it’s submitted, the previous response is updated with the additional feedback.
This allows us to capture and analyze partial feedback where the user is not willing to provide additional information.
Let’s do this 👇
-
Open the code editor where you handle your docs page.
-
Likely, you have a template file or similar which renders the navigation at the bottom of the page:
 Locate that file. We are using the Tailwind Template “Syntax” in this case.
- Write the frontend code for the widget. Here is the full component (we break it down right below):
import { Button } from "@/modules/ui/components/Button";
import { Popover, PopoverContent, PopoverTrigger } from "@/modules/ui/popover";
import { useRouter } from "next/router";
import { useState } from "react";
import {
  handleFeedbackSubmit,
  updateFeedback,
} from "../../lib/handleFeedbackSubmit";

export const DocsFeedback = () => {
  const router = useRouter();
  const [isOpen, setIsOpen] = useState(false);
  const [sharedFeedback, setSharedFeedback] = useState(false);
  const [responseId, setResponseId] = useState(null);
  const [freeText, setFreeText] = useState("");

  if (
    !process.env.NEXT_PUBLIC_FORMBRICKS_COM_DOCS_FEEDBACK_SURVEY_ID ||
    !process.env.NEXT_PUBLIC_FORMBRICKS_COM_API_HOST ||
    !process.env.NEXT_PUBLIC_FORMBRICKS_COM_ENVIRONMENT_ID
  ) {
    return null;
  }

  return (
    <div className="mt-6 inline-flex cursor-default items-center rounded-md border border-slate-200 bg-white p-4 text-slate-800 dark:border-slate-700 dark:bg-slate-800 dark:text-slate-300">
      {!sharedFeedback ? (
        <div>
          Was this page helpful?
          <Popover open={isOpen} onOpenChange={setIsOpen}>
            <div className="ml-4 inline-flex space-x-3">
              {["Yes 👍", " No 👎"].map((option) => (
                <PopoverTrigger
                  className="rounded border border-slate-200 bg-slate-50 px-4 py-2 text-slate-900 hover:bg-slate-100 hover:text-slate-600 focus:outline-none focus:ring-2 focus:ring-neutral-900 focus:ring-offset-1 dark:border-slate-700 dark:bg-slate-700 dark:text-slate-300 dark:hover:bg-slate-600 dark:hover:text-slate-300"
                  onClick={async () => {
                    const id = await handleFeedbackSubmit(
                      option,
                      router.asPath
                    );
                    setResponseId(id);
                  }}
                >
                  {option}
                </PopoverTrigger>
              ))}
            </div>
            <PopoverContent className="border-slate-300 bg-white dark:border-slate-500 dark:bg-slate-700">
              <form>
                <textarea
                  value={freeText}
                  onChange={(e) => setFreeText(e.target.value)}
                  placeholder="Please explain why..."
                  className="focus:border-brand-dark focus:ring-brand-dark mb-2 w-full rounded-md bg-white text-sm text-slate-900 dark:bg-slate-600 dark:text-slate-200 dark:placeholder:text-slate-200"
                />
                <div className="text-right">
                  <Button
                    type="submit"
                    variant="primary"
                    onClick={(e) => {
                      e.preventDefault();
                      updateFeedback(freeText, responseId);
                      setIsOpen(false);
                      setFreeText("");
                      setSharedFeedback(true);
                    }}
                  >
                    Send
                  </Button>
                </div>
              </form>
            </PopoverContent>
          </Popover>
        </div>
      ) : (
        <div>Thanks a lot, boss! 🤝</div>
      )}
    </div>
  );
};
const router = useRouter(); // to get the URL of the current docs page
const [isOpen, setIsOpen] = useState(false); // to close Popover after
const [sharedFeedback, setSharedFeedback] = useState(false); // to display Thank You message
const [responseId, setResponseId] = useState(null); // to store responseID (will explain more)
const [freeText, setFreeText] = useState(""); // to locally store the additional info provided by user
Disable feedback if incorrect config env vars
if (
  !process.env.NEXT_PUBLIC_FORMBRICKS_COM_DOCS_FEEDBACK_SURVEY_ID ||
  !process.env.NEXT_PUBLIC_FORMBRICKS_COM_API_HOST ||
  !process.env.NEXT_PUBLIC_FORMBRICKS_COM_ENVIRONMENT_ID
) {
  return null;
}
return (
    <div className="mt-6 inline-flex cursor-default items-center rounded-md border border-slate-200 bg-white p-4 text-slate-800 dark:border-slate-700 dark:bg-slate-800 dark:text-slate-300">
      {!sharedFeedback ? ( // displays Feedback buttons or Thank You message
        <div>
          Was this page helpful?
          <Popover open={isOpen} onOpenChange={setIsOpen}>
            <div className="ml-4 inline-flex space-x-3">
              {["Yes 👍", " No 👎"].map((option) => ( // Popup Trigger is a button as well. This is a workaround to open the same form but send a different response to the API
                <PopoverTrigger
                  className="rounded border border-slate-200 bg-slate-50 px-4 py-2 text-slate-900 hover:bg-slate-100 hover:text-slate-600 focus:outline-none focus:ring-2 focus:ring-neutral-900 focus:ring-offset-1 dark:border-slate-700 dark:bg-slate-700 dark:text-slate-300 dark:hover:bg-slate-600 dark:hover:text-slate-300"
                  onClick={async () => {
                    const id = await handleFeedbackSubmit(option, router.asPath); // handleFeedbackSubmit sends the Yes / No choice as well as the current URL to Formbricks and returns the responseId
                    setResponseId(id); // add responseId to local state so we can use it if user decides to add more feedback in free text field
                  }}>
                  {option} // "Yes 👍" or "No 👎" - they have to be identical with the choices in the survey on app.formbricks.com for it to work (!)
                </PopoverTrigger>
              ))}
            </div>
            <PopoverContent className="border-slate-300 bg-white dark:border-slate-500 dark:bg-slate-700">
              <form> // Form to handle additional feedback by user
                <textarea
                  value={freeText}
                  onChange={(e) => setFreeText(e.target.value)}
                  placeholder="Please explain why..."
                  className="focus:border-brand-dark focus:ring-brand-dark mb-2 w-full rounded-md bg-white text-sm text-slate-900 dark:bg-slate-600 dark:text-slate-200 dark:placeholder:text-slate-200"
                />
                <div className="text-right">
                  <Button
                    type="submit"
                    variant="primary"
                    onClick={(e) => {
                      e.preventDefault(); // prevent page from reloading (default HTML behaviour)
                      updateFeedback(freeText, responseId); // update initial Yes / No response with free text feedback
                      setIsOpen(false); // close Popover
                      setFreeText(""); // remove feedback from free text field local state
                      setSharedFeedback(true); // display Thank You message
                    }}>
                    Send
                  </Button>
                </div>
              </form>
            </PopoverContent>
          </Popover>
        </div>
      ) : (
        <div>Thanks a lot, boss! 🤝</div> // Thank You message
      )}
    </div>
  );
}
handleFeedbackSubmit function with comments:
handleFeedbackSubmit() function definition
export const handleFeedbackSubmit = async (YesNo, pageUrl) => {
  const response_data = {
    data: {
      isHelpful: YesNo, // the "Yes 👍" or "No 👎" response. Remember: They have to be identical with the choices in the survey on app.formbricks.com for it to work.
      pageUrl: pageUrl, // So you know which page the user gives feedback about.
    },
  };

  const payload = {
    response: response_data,
    surveyId: process.env.NEXT_PUBLIC_FORMBRICKS_COM_DOCS_FEEDBACK_SURVEY_ID, // For testing, replace this with the survey ID of your survey (more info below)
  };

  try {
    const res = await fetch(
      `${process.env.NEXT_PUBLIC_FORMBRICKS_COM_API_HOST}/api/v1/client/environments/${process.env.NEXT_PUBLIC_FORMBRICKS_COM_ENVIRONMENT_ID}/responses`, // For testing, replace this with the API host and environemnt ID of your Development environment on app.formbricks.com
  };
      {
        method: "POST",
        headers: {
          "Content-Type": "application/json",
        },
        body: JSON.stringify(payload),
      }
    );

    if (res.ok) {
      const responseJson = await res.json();
      return responseJson.id; // Returns the response ID
    } else {
      console.error("Error submitting form");
    }
  } catch (error) {
    console.error("Error submitting form:", error);
  }
};
updateFeedback function with comments:
updateFeedback() function definition
export const updateFeedback = async (freeText, responseId) => {
  if (!responseId) {
    console.error("No response ID available"); // If there is not response ID, no response can be updated.
    return;
  }

  const payload = {
    response: {
      data: {
        additionalInfo: freeText,
      },
      finished: true, // Lets Formbricks calculate Completion Rate
    },
  };

  try {
    const res = await fetch(
      `${process.env.NEXT_PUBLIC_FORMBRICKS_COM_API_HOST}/api/v1/client/environments/${process.env.NEXT_PUBLIC_FORMBRICKS_COM_ENVIRONMENT_ID}/responses/${responseId}`,
      {
        method: "PUT",
        headers: {
          "Content-Type": "application/json",
        },
        body: JSON.stringify(payload),
      }
    );

    if (!res.ok) {
      console.error("Error updating response");
    }
  } catch (error) {
    console.error("Error updating response:", error);
  }
};
4. Setting it up for testing
Before you roll it out in production, you want to test it. To do so, you need two things:
-
Environment ID (1) of the development environment on app.formbricks.com
-
Survey ID (2) of your test survey
When you are on the survey detail page, you’ll find both of them in the URL:
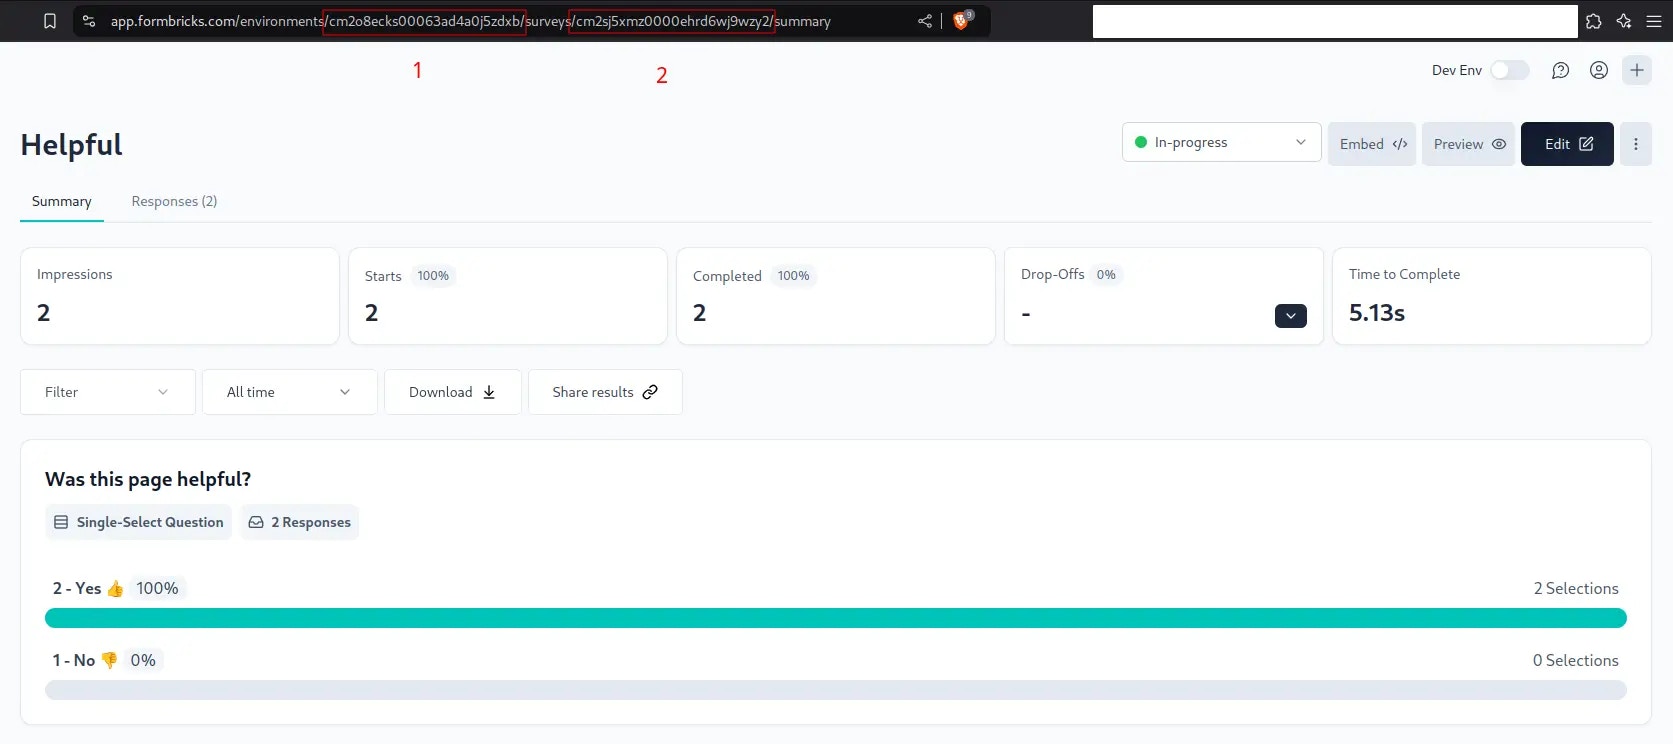 Now, you have to replace the IDs and the API host accordingly in your
 handleFeedbackSubmit:
Replace the ID and API accordingly
  const payload = {
    response: response_data,
    surveyId: clgwfv4a7002el50ihyuss38x, // This is an example, replace with yours
  };

  try {
    const res = await fetch(
			// Note that we also updated the API host to 'https://app.formbricks.com/'
      `https:app.formbricks.com/api/v1/client/environments/clgwcwp4z000lpf0hur7uxbuv/responses`,
  };
updateFeedback function
Replace the ID and API here as well
  try {
    const res = await fetch(
		// Note that we also updated the API host to 'https://app.formbricks.com/'
      `https:app.formbricks.com/api/v1/client/environments/clgwcwp4z000lpf0hur7uxbuv/responses/${responseId}`, // Note that we also updated the API host to 'https://app.formbricks.com/'
}
You’re good to go! 🎉
Something doesn’t work? Check your browser console for the error.
Need help? Reach out in GitHub Discussions 


