Purpose
Understanding why free users don’t convert to paid users helps boost revenue. This insight allows you to adjust your offering to encourage more users to upgrade.Formbricks Approach
- Ask at exactly the right point in time.
- Ask to understand the problem, don’t ask for solutions.
Installation
To display the Trial Conversion Survey in your app you want to proceed as follows:- Create new Trial Conversion Survey at app.formbricks.com.
- Set up the user action to display survey at right point in time.
- Print it.
Is the Formbricks Widget Running?
We assume you’ve already installed the Formbricks Widget in your web app, as it’s required to display messages and surveys. If not, follow the Quick Start Guide (takes 15 mins max.).1. Create new Trial Conversion Survey
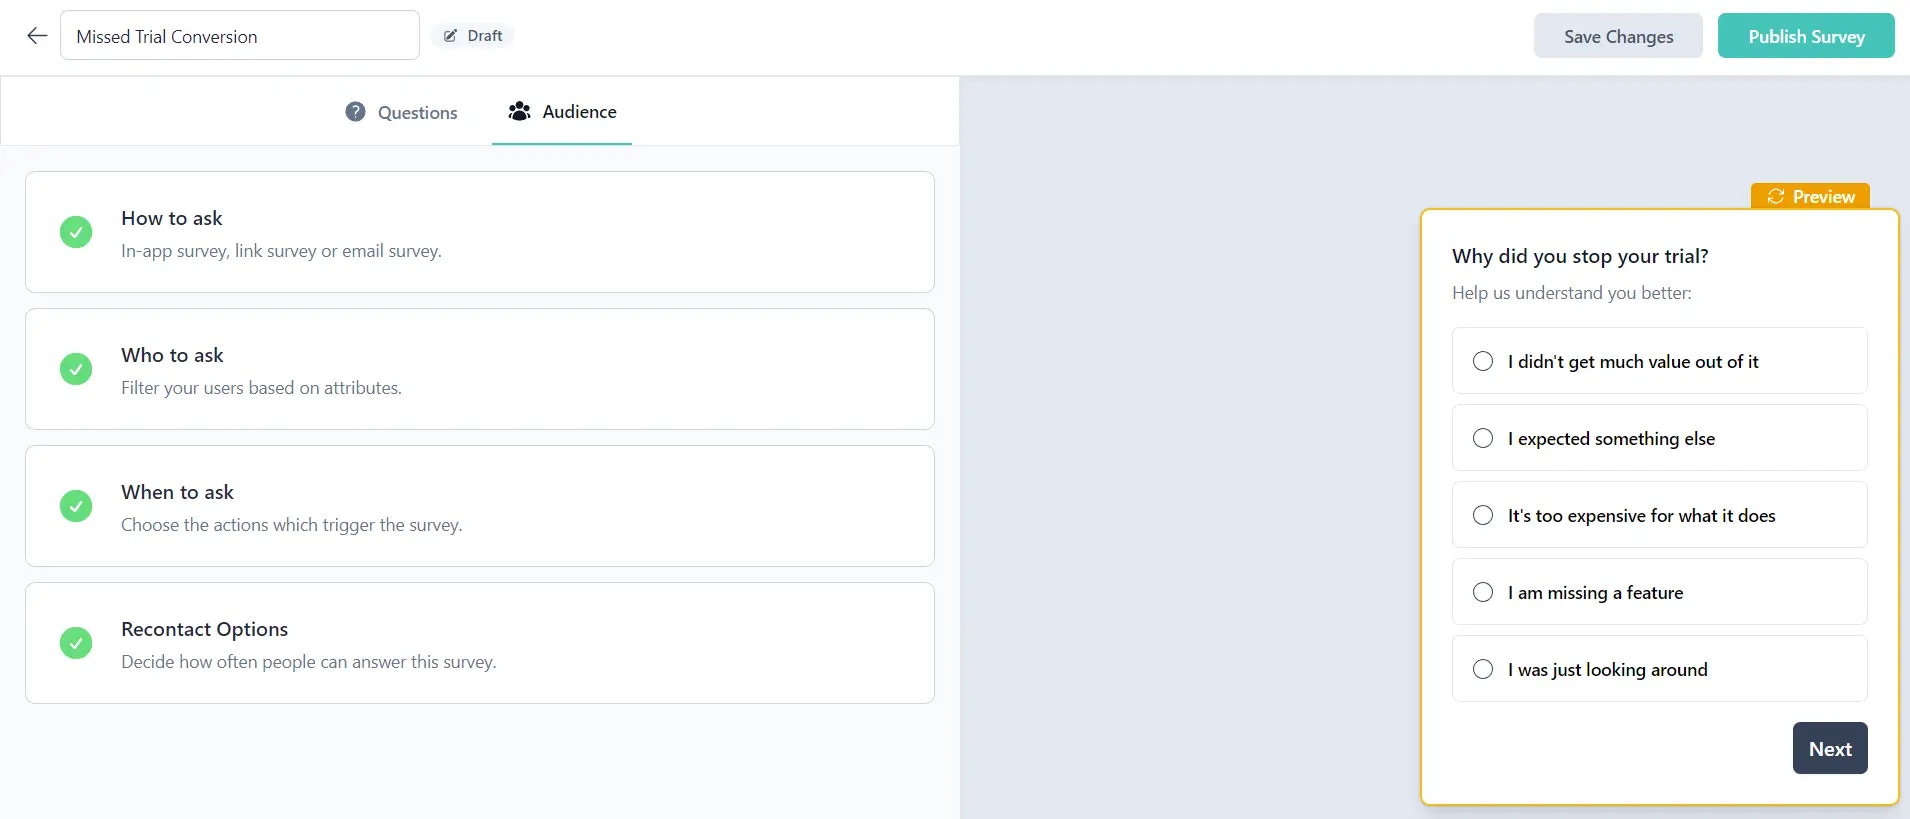
If you don’t have an account yet, create one at app.formbricks.com Click on Create Survey and select the template, Improve Trial Conversion: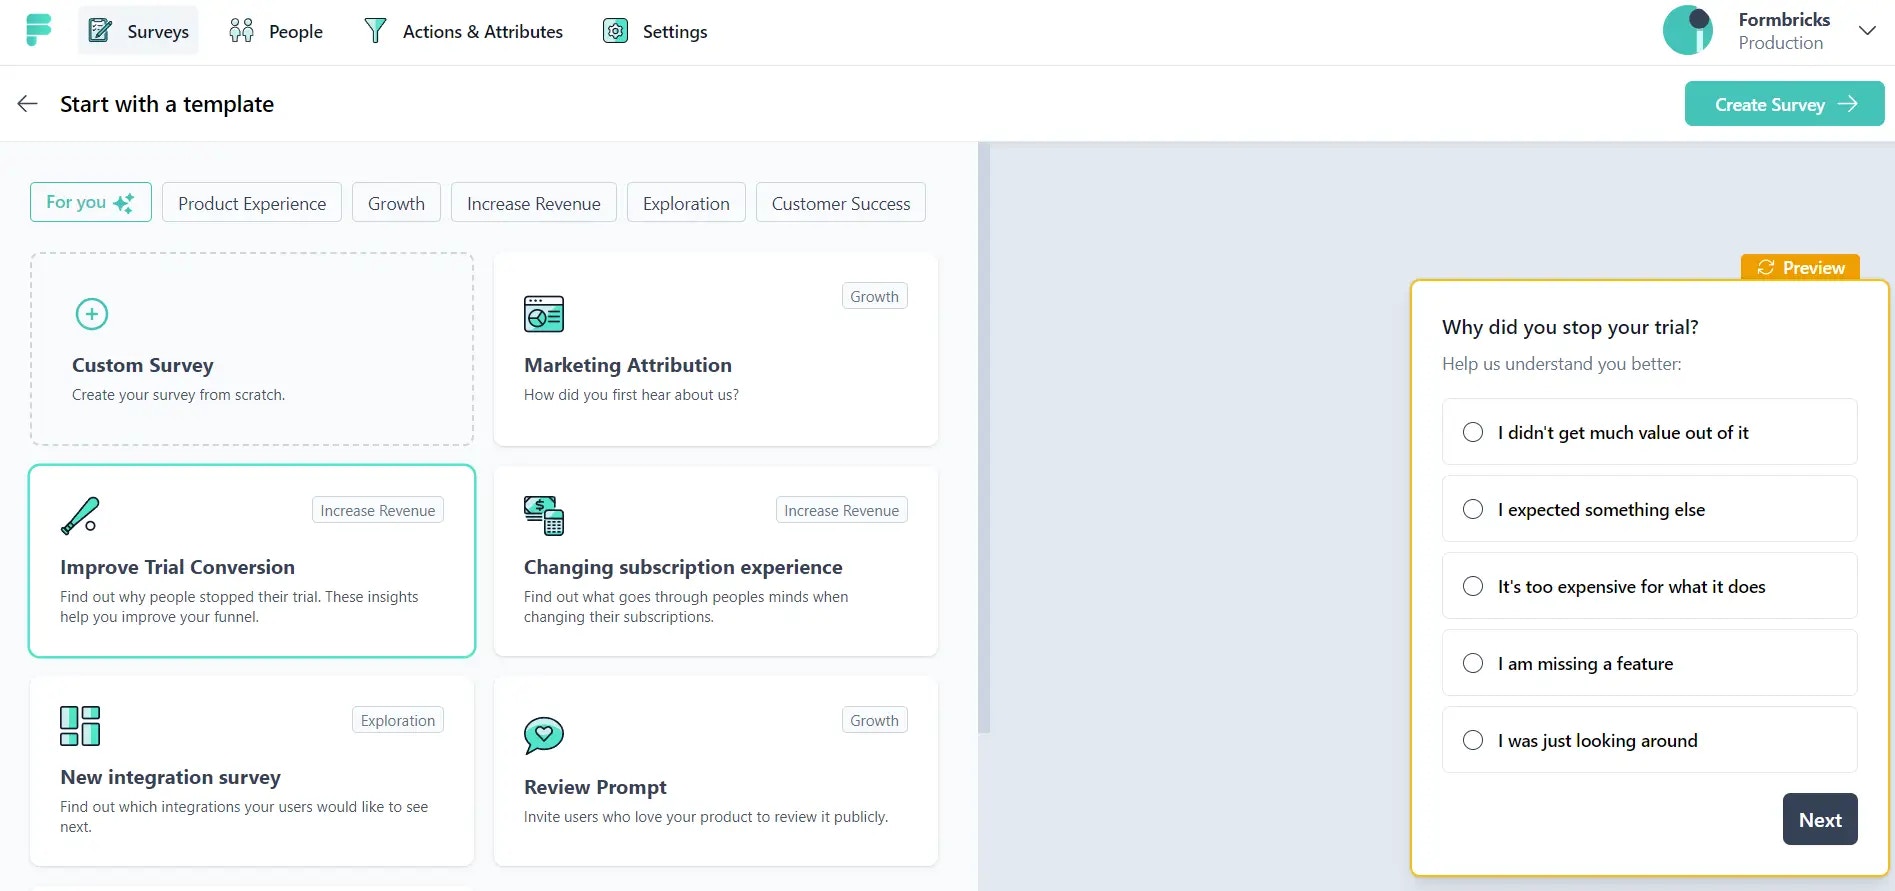
2. Optional: Update questions
You can update the questions and answer options.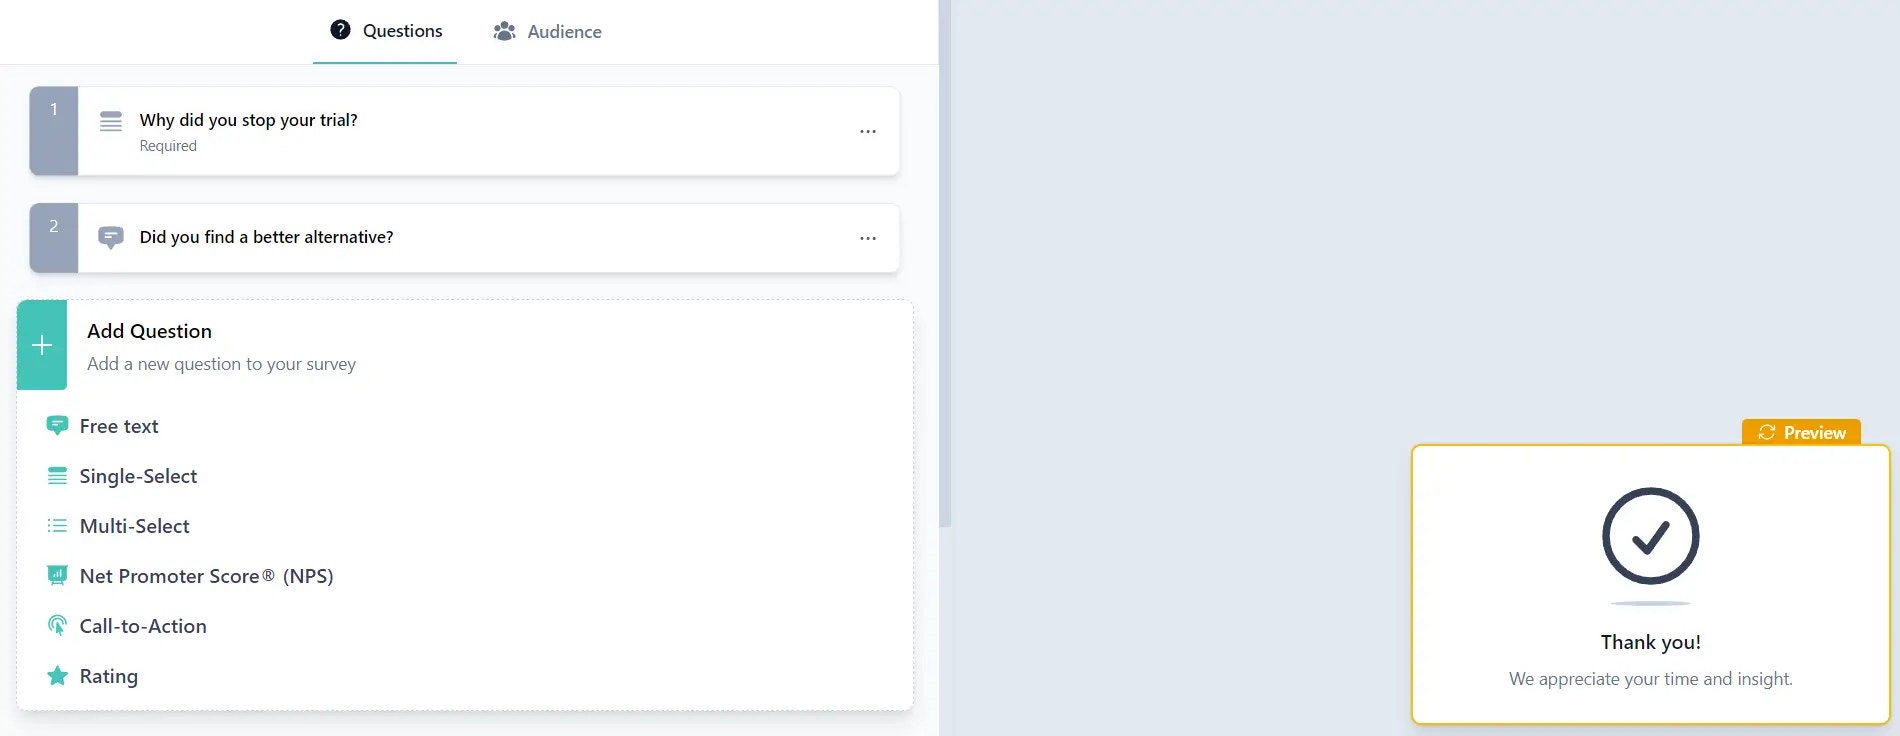
3. Pre-segment your audience (coming soon)
Filter by Attribute Coming Soon
We’re working on pre-segmenting users by attributes. This manual will be updated in the coming days.4. Set up a trigger for the Trial Conversion Survey:
How you trigger your survey depends on your product. There are two options:- Trigger by Page view: If you have a page like
/trial-cancelledfor users who cancel their trial subscription, create a user action with the type “Page View.” Select “Limit to specific pages” and apply URL filters with these settings:
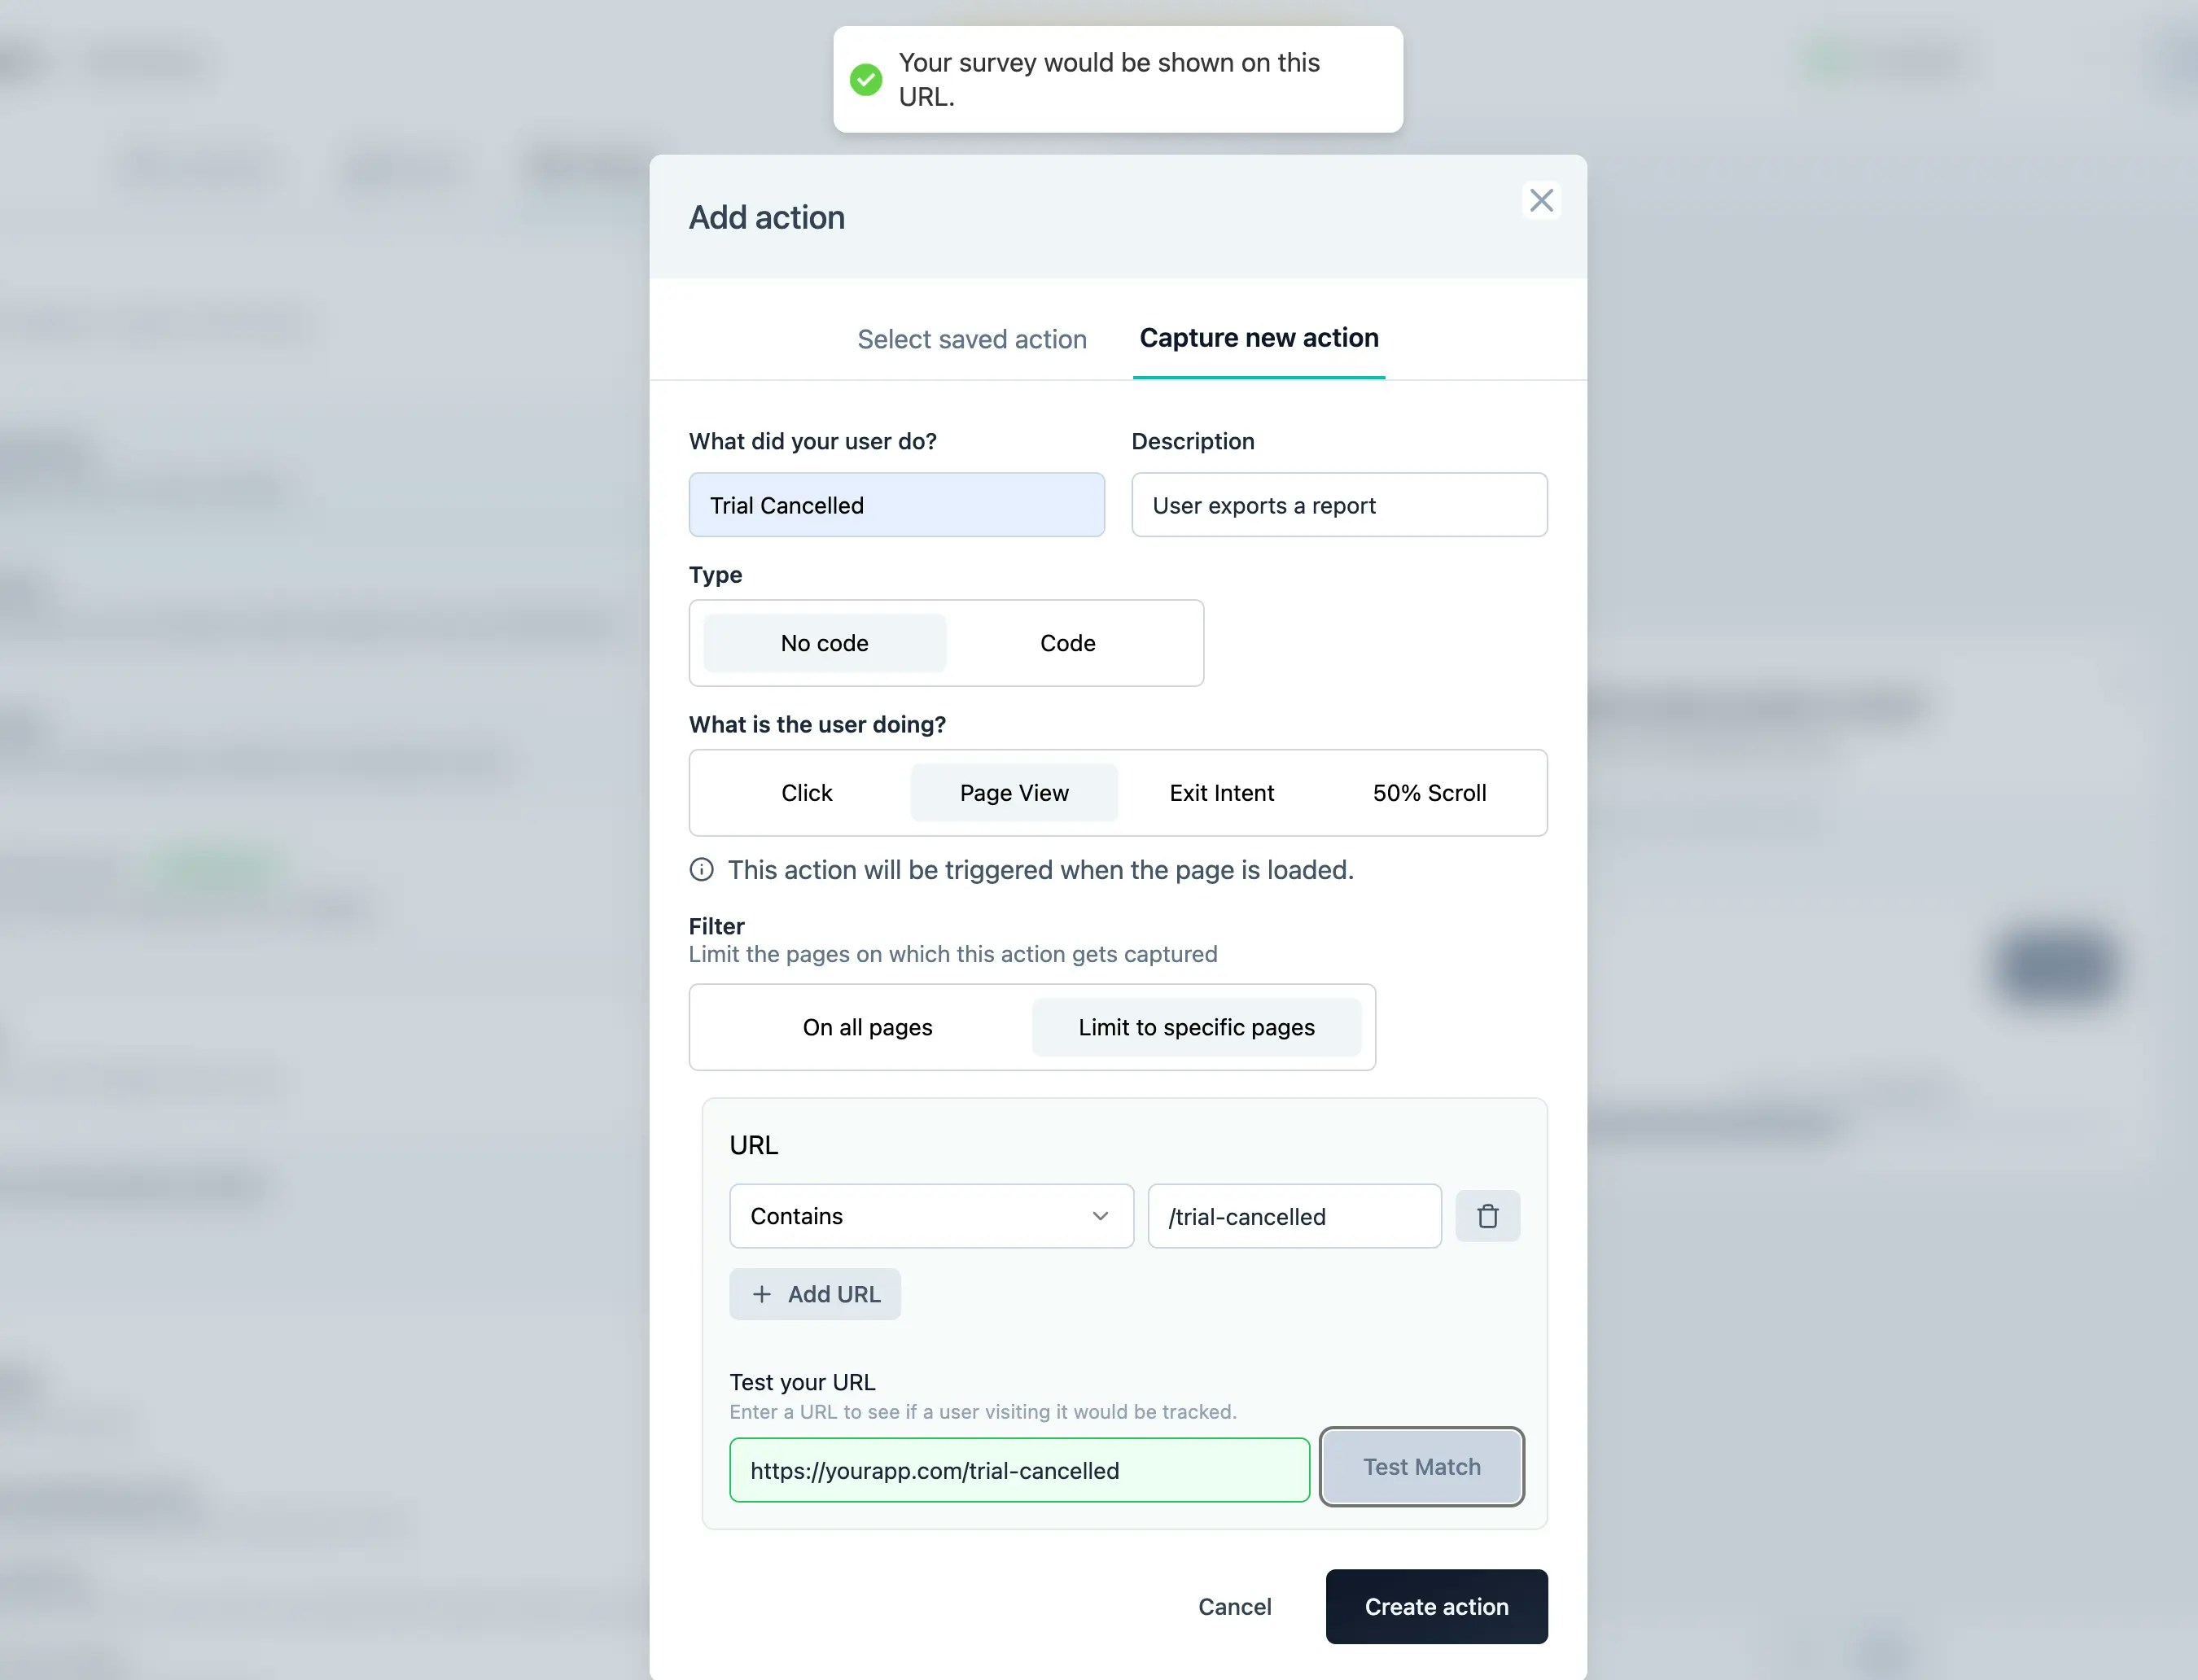
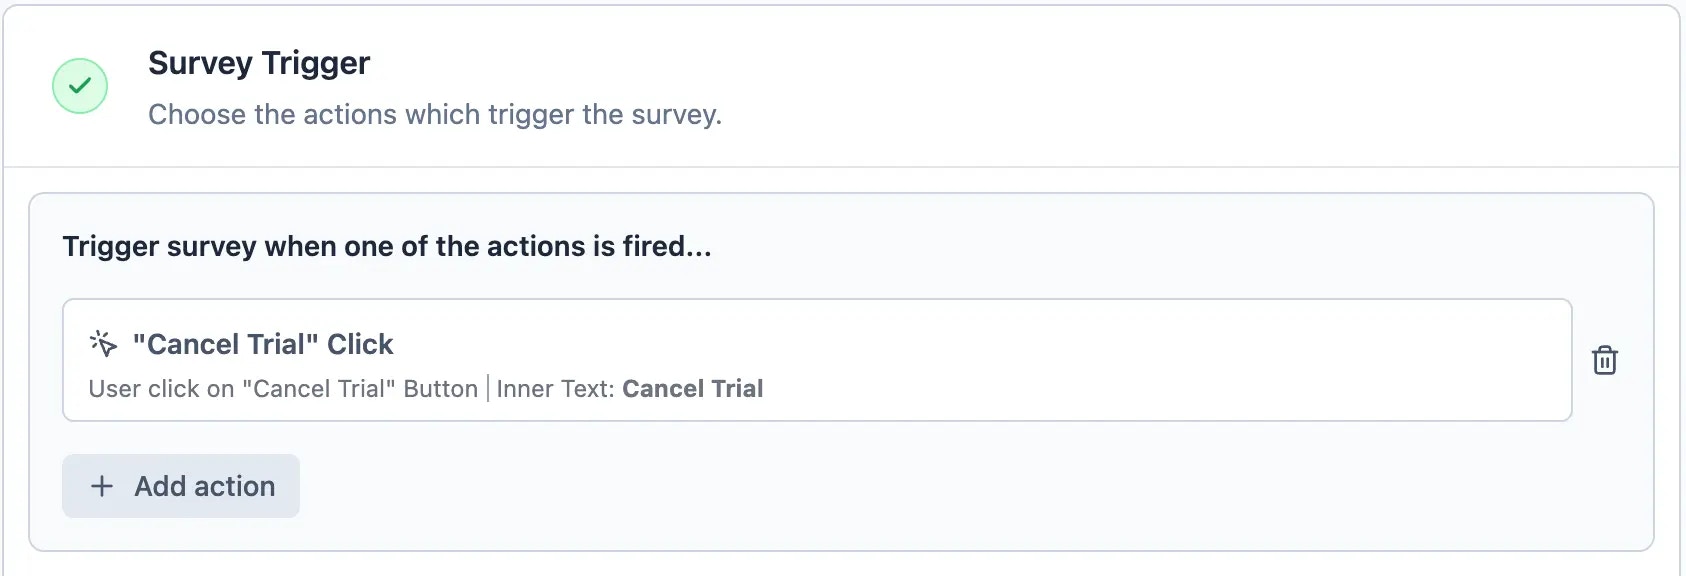
- Trigger by Button Click: In a different case, you have a “Cancel Trial” button in your app. You can setup a user Action with the
Inner Text:
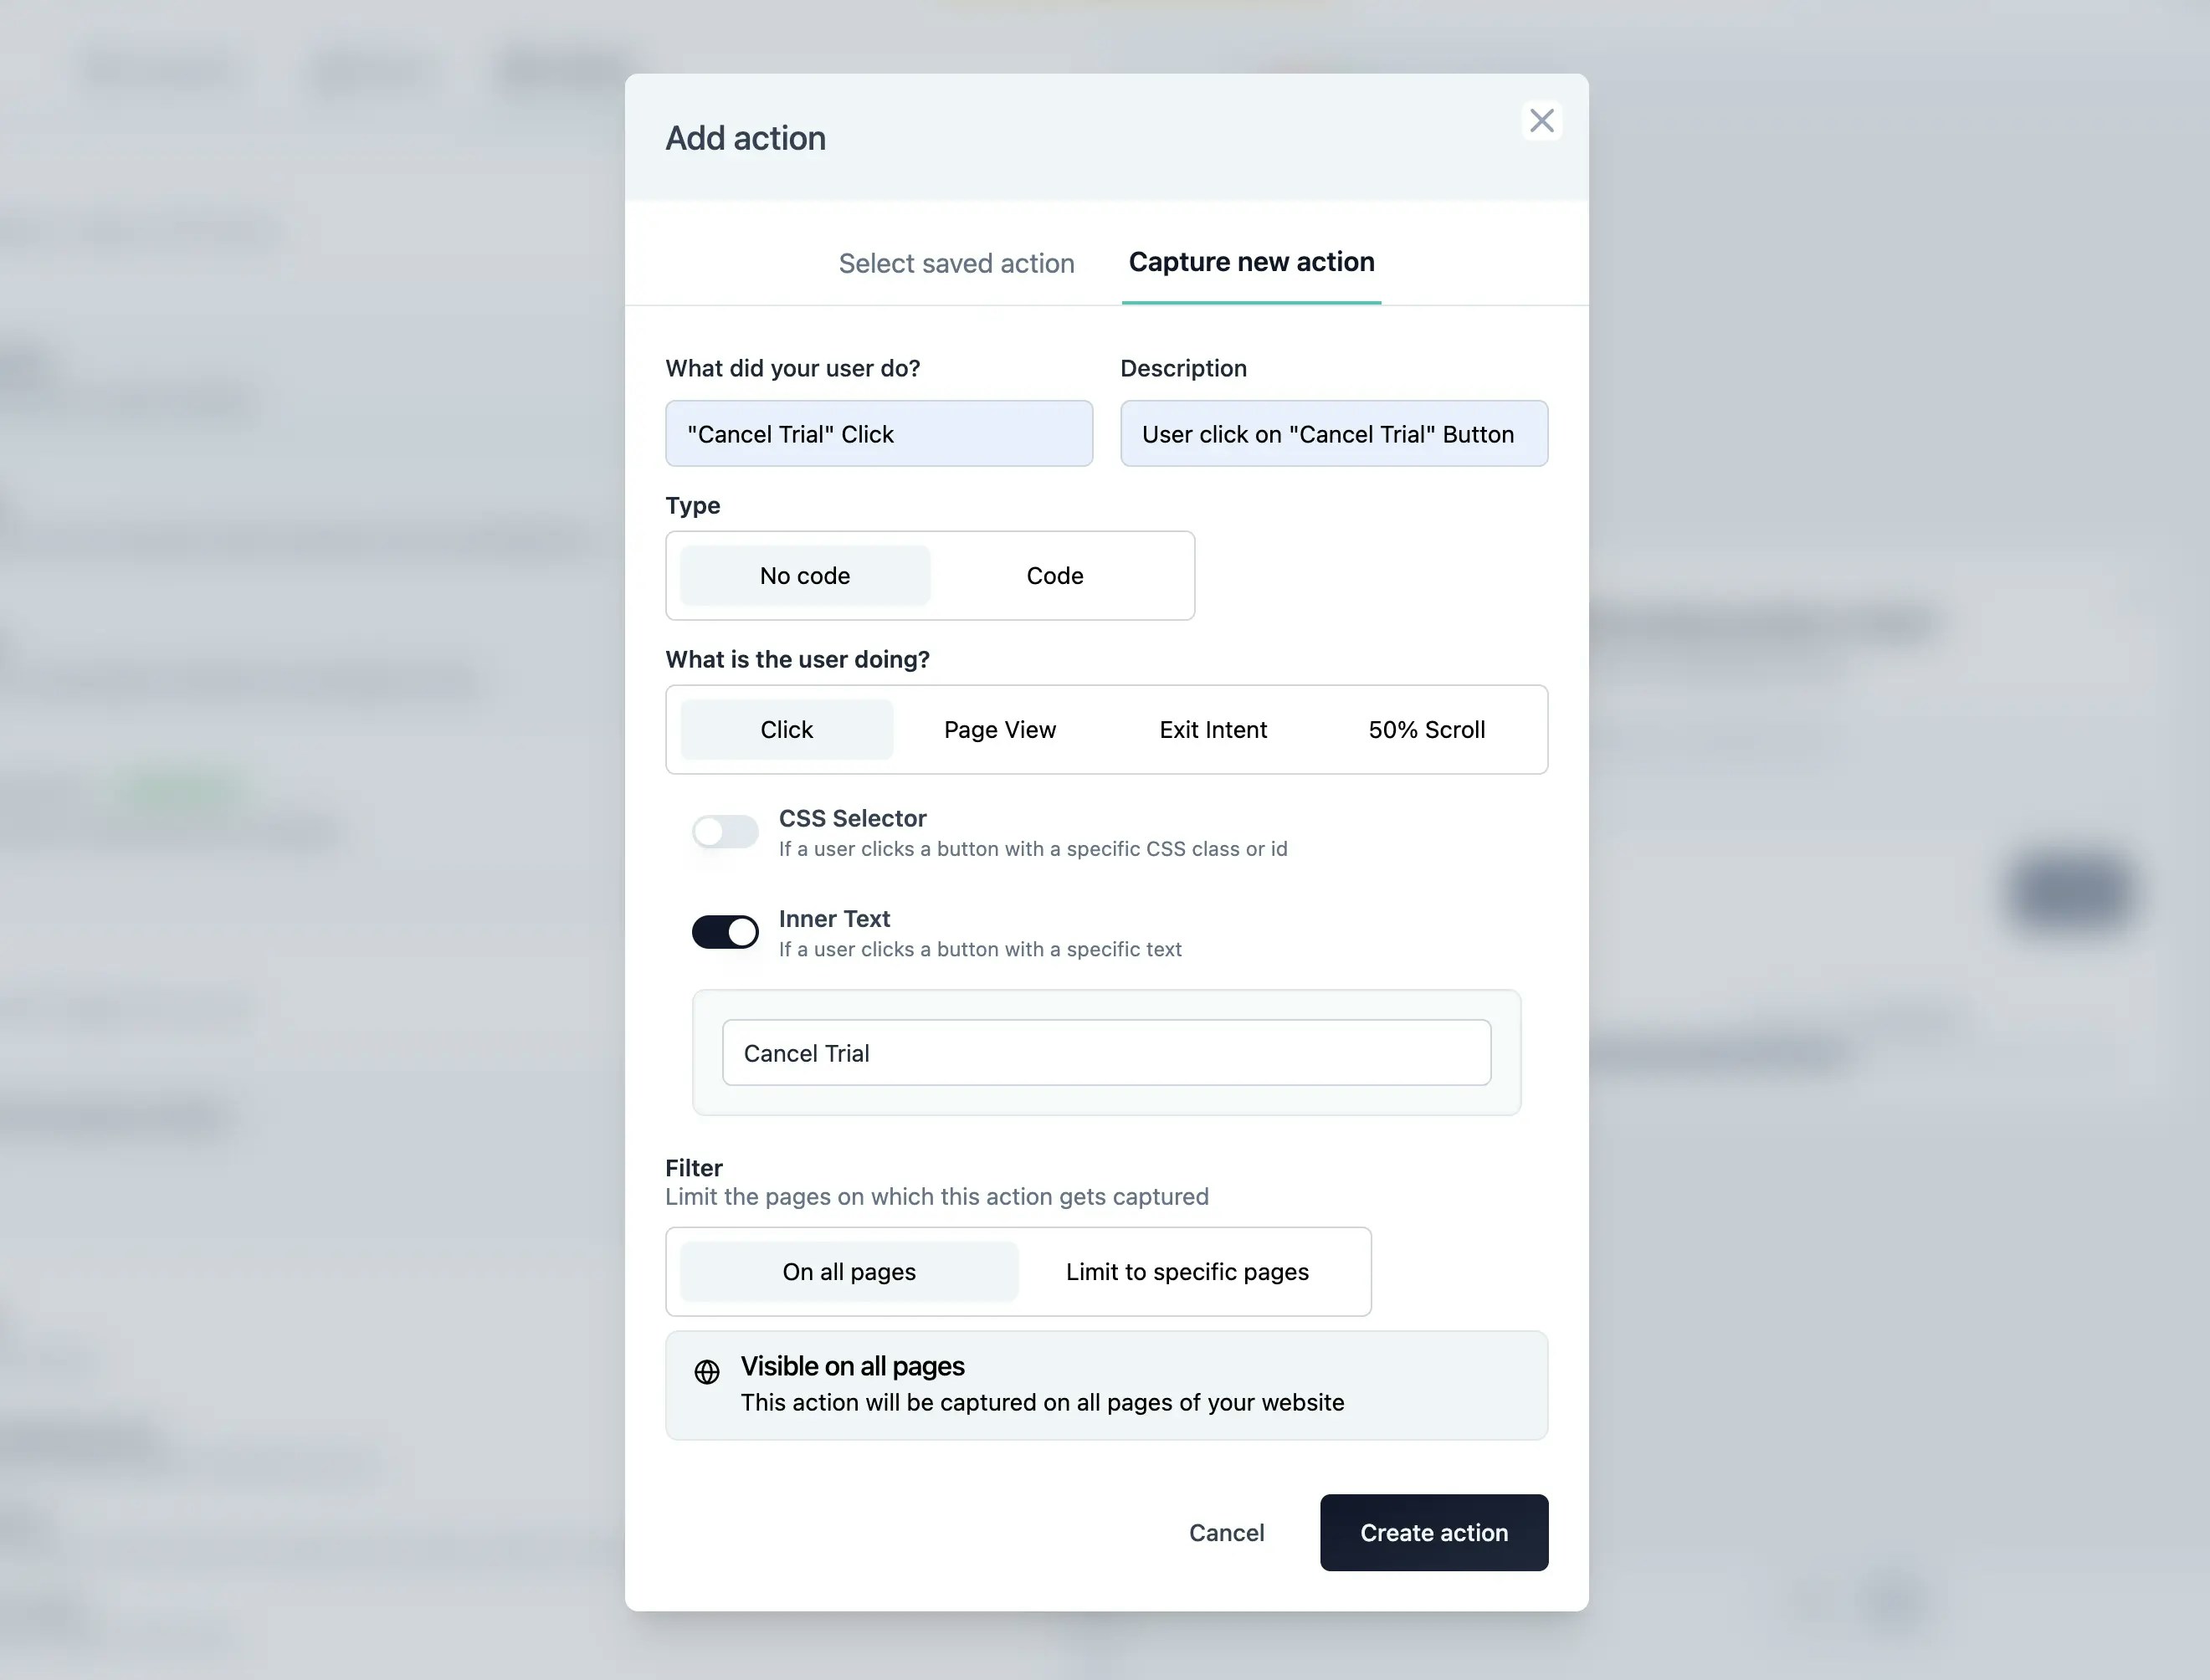
5. Select Action in the “When to ask” card
6. Last step: Set Recontact Options correctly
Finally, scroll down to “Recontact Options” and select the appropriate settings to gather the most insights. Ensure the survey is always displayed, even if the user has seen it in the past few days.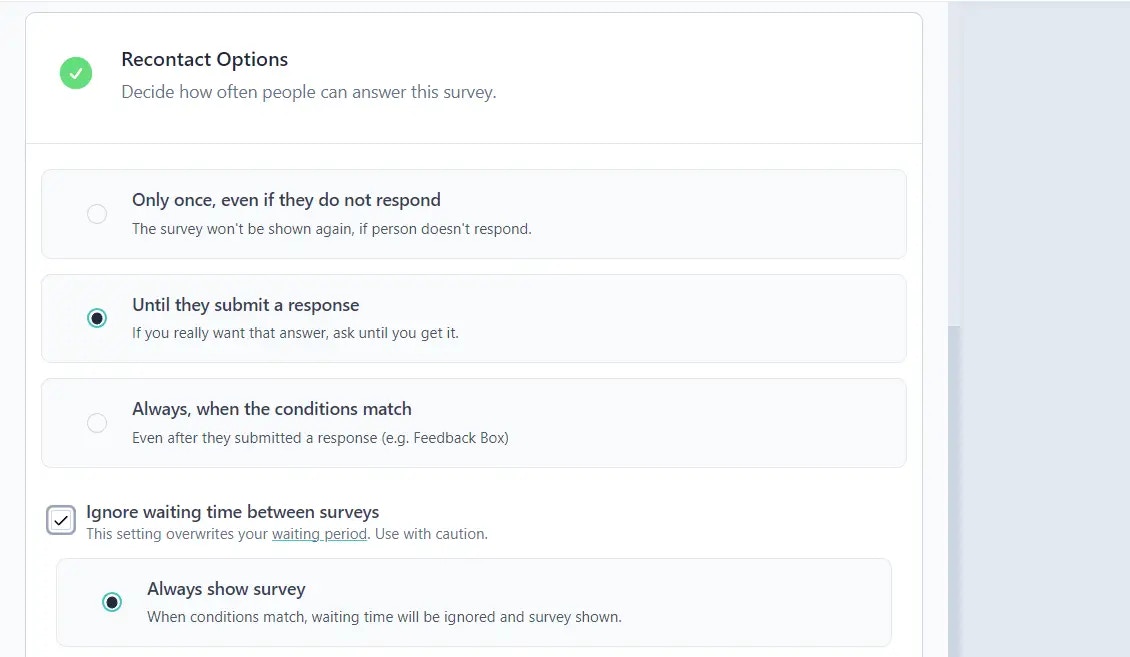
7. Congrats! You’re ready to publish your survey 🥳
Formbricks Widget running? You need to have the Formbricks Widget installed to display the Feedback Box in your app. Please follow this tutorial (Step 4 onwards) to install the widget.

