> ## Documentation Index
> Fetch the complete documentation index at: https://formbricks.com/docs/llms.txt
> Use this file to discover all available pages before exploring further.
# Build a workflow
> Choose and configure a workflow trigger and action, check the workflow, and enable it.
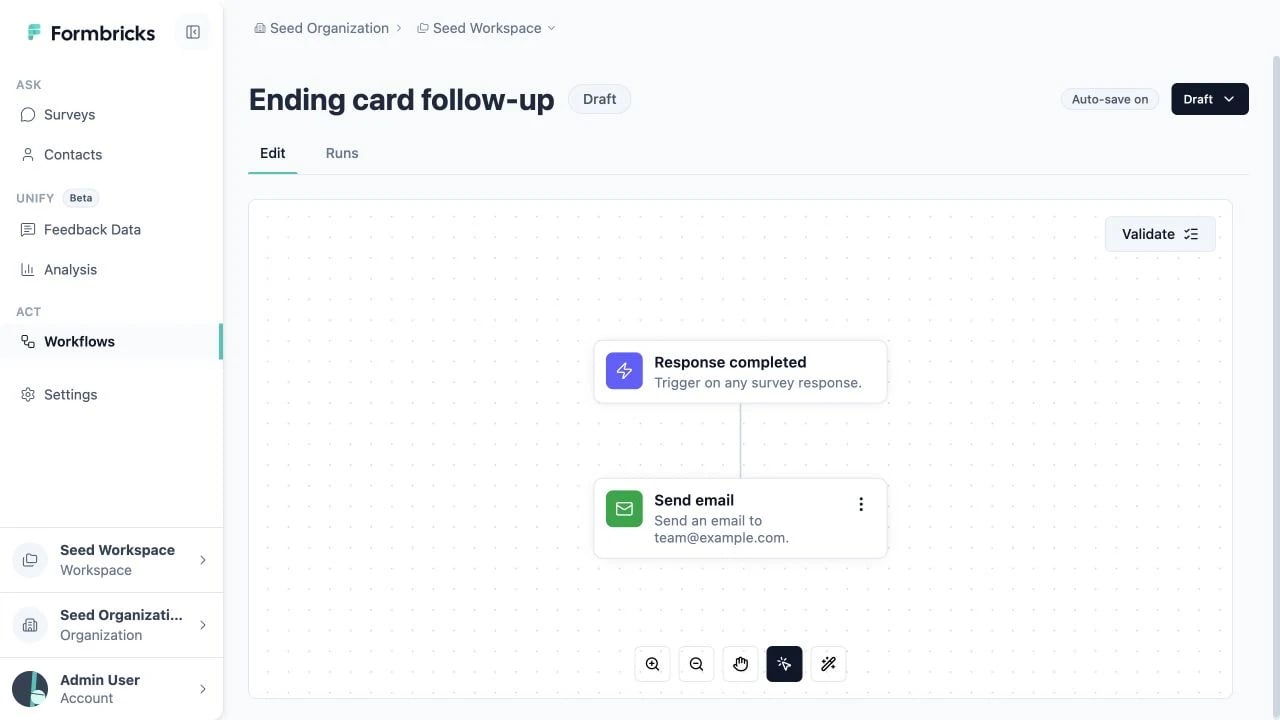
Use the workflow builder to combine a trigger with the actions it should run. This guide uses the currently
available **Response completed** trigger and **Send email** action as examples. The builder lists the options
available in your Formbricks version. Changes to draft and disabled workflows are saved automatically.
 ## Before you begin
You need write or manage access to the workspace. For the **Response completed** example, you also need a
survey in the same workspace as the workflow.
If you use **Send email** and the message should go to an address collected from a response, configure at
least one compatible recipient source in the survey, such as an email question, contact information, email
verification, or a hidden field.
## Create a workflow
Select **Workflows** in the workspace navigation, then select **New workflow**. Formbricks creates a
draft and opens the builder. Rename the workflow using the title at the top of the page.
Select **Add trigger**, then choose a trigger from the list, such as **Response completed**. Select the
trigger card to open its configuration.
Select the **+** below the trigger, then choose an action from the list, such as **Send email**. Select the
action card to open its configuration.
## Configure the Response completed trigger
If you choose the **Response completed** trigger, select the survey whose completed responses should start
the workflow. Changing the linked survey clears any ending card and email recipient configuration that
belonged to the previous survey.
Under **Ending cards**, choose one of these scopes:
* **All endings** runs the workflow for every completed response, including ending cards added later.
* **Specific endings** runs it only when the respondent reaches one of the selected ending cards.
## Configure the Send email action
If you choose the **Send email** action, complete these fields in its configuration panel:
| Field | Configuration |
| ------------ | ------------------------------------------------------------------------------------- |
| **Send to** | Select one recipient source from the linked survey or workspace. |
| **From** | Shows the deployment sender address. This value is read-only in the workflow builder. |
| **Reply to** | Enter one or more addresses that should receive replies. |
| **Subject** | Enter the email subject. |
| **Body** | Write the message and insert survey recall values where needed. |
The **Send to** options can include:
* The verified email address, when email verification is enabled for the survey
* An Open Text question configured for email input
* The email field of a Contact Info question
* A hidden field
* A workspace member, including yourself
### Personalize the body
Type `@` in the **Body** editor to insert recall values from the linked survey. You can recall answers,
variables, and hidden fields to personalize the message for each run. Learn more about the available sources
in [Recall Data](/docs/surveys/general-features/recall).
### Include response data
Turn on **Attach response data** to include the triggering survey response with the email. You can then also
turn on **Include variables** and **Include hidden fields**.
## Check validity or enable
The status button in the upper-left corner shows whether the editor's client-side checks consider the
workflow **Valid** or **Invalid**. Select it whenever you want Formbricks to manually verify that the current
workflow definition is valid and executable. For the **Response completed** example, the manual check also
confirms that required configuration is present and that the linked survey and selected ending cards still
exist.
Running the manual check is optional and side-effect-free. It does not create a run or execute an action. It
is available for draft, enabled, and disabled workflows, but not archived workflows, and it requires
workspace write access.
You do not have to run the manual check before enabling. Open the status menu and select **Enable** when you
are ready to start the workflow. An enabled workflow listens for its configured trigger. Its definition is
read-only while enabled; select **Disable** before editing it again.
Enabling verifies that the workflow is executable. A workflow with incomplete or outdated configuration
cannot be enabled.
## Before you begin
You need write or manage access to the workspace. For the **Response completed** example, you also need a
survey in the same workspace as the workflow.
If you use **Send email** and the message should go to an address collected from a response, configure at
least one compatible recipient source in the survey, such as an email question, contact information, email
verification, or a hidden field.
## Create a workflow
Select **Workflows** in the workspace navigation, then select **New workflow**. Formbricks creates a
draft and opens the builder. Rename the workflow using the title at the top of the page.
Select **Add trigger**, then choose a trigger from the list, such as **Response completed**. Select the
trigger card to open its configuration.
Select the **+** below the trigger, then choose an action from the list, such as **Send email**. Select the
action card to open its configuration.
## Configure the Response completed trigger
If you choose the **Response completed** trigger, select the survey whose completed responses should start
the workflow. Changing the linked survey clears any ending card and email recipient configuration that
belonged to the previous survey.
Under **Ending cards**, choose one of these scopes:
* **All endings** runs the workflow for every completed response, including ending cards added later.
* **Specific endings** runs it only when the respondent reaches one of the selected ending cards.
## Configure the Send email action
If you choose the **Send email** action, complete these fields in its configuration panel:
| Field | Configuration |
| ------------ | ------------------------------------------------------------------------------------- |
| **Send to** | Select one recipient source from the linked survey or workspace. |
| **From** | Shows the deployment sender address. This value is read-only in the workflow builder. |
| **Reply to** | Enter one or more addresses that should receive replies. |
| **Subject** | Enter the email subject. |
| **Body** | Write the message and insert survey recall values where needed. |
The **Send to** options can include:
* The verified email address, when email verification is enabled for the survey
* An Open Text question configured for email input
* The email field of a Contact Info question
* A hidden field
* A workspace member, including yourself
### Personalize the body
Type `@` in the **Body** editor to insert recall values from the linked survey. You can recall answers,
variables, and hidden fields to personalize the message for each run. Learn more about the available sources
in [Recall Data](/docs/surveys/general-features/recall).
### Include response data
Turn on **Attach response data** to include the triggering survey response with the email. You can then also
turn on **Include variables** and **Include hidden fields**.
## Check validity or enable
The status button in the upper-left corner shows whether the editor's client-side checks consider the
workflow **Valid** or **Invalid**. Select it whenever you want Formbricks to manually verify that the current
workflow definition is valid and executable. For the **Response completed** example, the manual check also
confirms that required configuration is present and that the linked survey and selected ending cards still
exist.
Running the manual check is optional and side-effect-free. It does not create a run or execute an action. It
is available for draft, enabled, and disabled workflows, but not archived workflows, and it requires
workspace write access.
You do not have to run the manual check before enabling. Open the status menu and select **Enable** when you
are ready to start the workflow. An enabled workflow listens for its configured trigger. Its definition is
read-only while enabled; select **Disable** before editing it again.
Enabling verifies that the workflow is executable. A workflow with incomplete or outdated configuration
cannot be enabled.